Peanuts (Arachis hypogaea) are a valuable cash crop for South African farmers due to their high protein content and oil yield. With proper planning and management, peanuts can thrive in South Africa’s warm climate. Here’s a detailed guide to growing peanuts, from land preparation to storage, covering each growth stage, inputs, machinery, and disease management.
1. Land Preparation
Peanuts grow best in well-drained, sandy loam soils with a pH of 5.5 to 6.5. Proper land preparation is crucial to ensure optimal growth and yield.
- Soil Testing: Conduct a soil test to determine nutrient levels and pH. Amend the soil with lime if needed to correct pH.
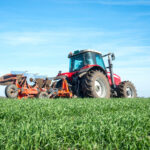
- Plowing: Start by deep plowing (20–25 cm) to loosen the soil and remove compaction. This encourages root growth and allows peanuts to bury their pods easily.
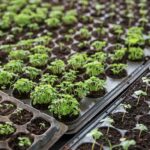
- Tilling: Break up large clods and level the field using a harrow. Peanuts require a fine seedbed for even germination and root development.
- Fertilizers: Peanuts are leguminous, meaning they can fix nitrogen from the air. However, they may still need fertilizers rich in potassium (K) and phosphorus (P) during land preparation. Apply 150–200 kg/ha of a balanced fertilizer like 10:10:10 before planting.
2. Seed Selection and Planting
Selecting the right peanut variety is important for your region and market demand. Popular varieties in South Africa include Sultani, Natal Common, and Mani Pintar.
- Seed Treatment: Before planting, treat seeds with a fungicide or rhizobium inoculant to promote nitrogen fixation and protect against seedling diseases like damping-off.
- Planting Time: Peanuts are warm-season crops. In South Africa, they are typically planted between October and December when soil temperatures are around 20°C or higher.
- Planting Depth and Spacing: Sow seeds 3–5 cm deep with a spacing of 45–60 cm between rows and 15–20 cm between plants within rows.
- Watering: After planting, ensure the soil is moist but not waterlogged. A drip irrigation system can ensure consistent moisture.
3. Growth Stages and Watering Requirements
Peanuts go through several key stages of growth, each with specific water and nutrient requirements.
- Germination (7–10 days): The seeds sprout, and the first leaves emerge. Ensure the soil remains moist, but avoid overwatering.
- Vegetative Stage (Weeks 2–6): Peanuts grow foliage and roots during this period. Irrigate moderately and apply 20–30 kg/ha of potassium fertilizer to promote root development.
- Flowering and Pegging Stage (Weeks 6–10): Flowers appear, and pegs (ovaries) grow downward into the soil. Peanuts require more water during this phase, about 25–50 mm of water per week. Ensure adequate phosphorus during this stage to boost flower production.
- Pod Development and Maturity (Weeks 10–18): This is the most critical period for water, requiring about 50 mm of water per week. Reduce watering as the plants approach maturity to prevent mold and rot in the pods.
4. Fertilizers and Nutrient Management
Peanuts generally require minimal nitrogen fertilizer but do benefit from other nutrients:
- Phosphorus (P): Apply 20–30 kg/ha to encourage strong root systems.
- Potassium (K): Important for pod filling and overall plant health. Apply 60–100 kg/ha during early growth.
- Calcium (Ca): Essential during pod development. Apply gypsum (200–300 kg/ha) when the plants begin pegging.
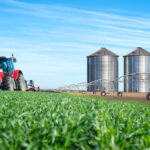
5. Machinery and Equipment
Modern peanut farming can benefit from various types of machinery:
- Planters: Use a precision planter designed for peanuts to ensure even seeding and appropriate depth.
- Cultivators: These help control weeds between rows during the early growth stages.
- Irrigation Systems: Drip or sprinkler systems are ideal for maintaining consistent soil moisture.
- Harvesting Machines: Peanut harvesters or diggers gently uproot the plants and shake off the soil while ensuring pods are intact.
6. Weed Control and Herbicide Use
Weeds can significantly reduce peanut yields by competing for nutrients, water, and light.
- Pre-Emergence Herbicides: Apply pre-emergence herbicides like pendimethalin or metolachlor immediately after planting to prevent weeds from sprouting.
- Post-Emergence Herbicides: Use post-emergence herbicides like clethodim or bentazon during early growth to control broadleaf and grass weeds. Apply these before the flowering stage to avoid damaging peanut plants.
- Hand Weeding: Manual weeding may still be required, especially if the weed pressure is high or in areas where herbicide use is restricted.
7. Disease Management and Pesticides
Peanuts are susceptible to various diseases, which can severely impact yield if not controlled.
- Early Leaf Spot and Late Leaf Spot: These fungal diseases can defoliate plants, reducing yields. Apply fungicides like chlorothalonil or tebuconazole at the first signs of infection (usually around flowering).
- Rust: Another fungal disease that affects leaves. Apply systemic fungicides like azoxystrobin or triazoles as a preventive measure in humid conditions.
- Aflatoxin: A dangerous fungus that affects peanuts in warm, humid conditions. Control this by reducing moisture stress during pod development and using aflatoxin-resistant varieties.
8. Pest Management and Pesticide Use
Common peanut pests include thrips, root-knot nematodes, and peanut pod borers.
- Thrips: These pests damage young leaves. Apply insecticides like imidacloprid during the early vegetative stage if thrips are detected.
- Nematodes: Nematodes cause stunted growth and poor pod development. Soil fumigation with nematicides is recommended before planting in heavily infested areas.
- Pod Borers: These attack during the pod development stage. Use pheromone traps and apply insecticides like spinosad if infestations are detected.
9. Harvesting
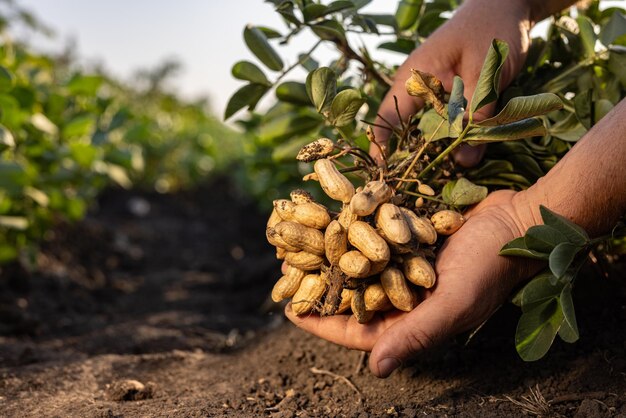
Peanuts are ready for harvest when about 70–80% of the pods have matured, which is usually 120–150 days after planting.
- Signs of Maturity: Look for darkened inner pod walls and firm kernels. You can also check by pulling up a few plants to inspect the pods.
- Harvesting Process: Use a peanut digger or harvester to lift the plants from the soil. Allow the plants to dry in the field for a few days before threshing (removing the pods from the plants).
- Drying: After harvesting, peanuts need to be dried to a moisture content of 8–10%. This can be done using mechanical dryers or by air-drying in a well-ventilated area.
10. Storage
Proper storage is essential to maintain peanut quality and prevent aflatoxin contamination.
- Storage Conditions: Store peanuts in a cool, dry place with relative humidity below 70%. If storing in bulk, use ventilated silos or storage bags to allow air circulation.
- Pest Control: Regularly inspect storage areas for pests like rodents and insects. Use rodent traps and insecticides as needed to protect the crop.
Peanut farming in South Africa can be highly profitable if managed properly. By preparing the land, selecting the right seeds, ensuring adequate nutrients and water, and employing effective pest and disease control measures, farmers can achieve high yields. Careful attention to each growth stage, from planting to storage, will ensure the highest quality and yield, contributing to the success of your peanut farming enterprise.
Join 'Farmers Mag' WhatsApp Channel
Get the latest Farming news and tips delivered straight to your WhatsApp
CLICK HERE TO JOIN