
Canola is an important crop for South African farmers, offering opportunities for diversification and high-value production. As a winter crop, canola thrives in areas such as the Western Cape, where cool, moist conditions provide the ideal environment. In this guide, we’ll cover the complete process of growing canola, from seed to harvest and storage, focusing on each growth stage, the required inputs and machinery, pest and disease management, and optimal farming practices for success.
1. Land Preparation
Soil Type
Canola grows best in well-drained, fertile soils with a pH between 5.5 and 7.0. Loamy or sandy soils with good organic content are ideal, though clay soils can also work if properly prepared. South African soils in the Western Cape and other canola-growing areas typically meet these requirements but may need pH adjustment with lime applications.
Tillage and Seedbed Preparation
To prepare the land for canola, farmers should till the soil to a fine, firm seedbed. Minimal tillage is recommended to maintain soil structure and moisture, especially in areas with limited rainfall. Deep ploughing may be necessary if there is soil compaction, but in general, shallow tilling followed by harrowing ensures good seed-to-soil contact.
2. Seed Selection and Sowing
Seed Varieties
Select high-yielding, disease-resistant canola varieties suited to your region. Ensure the seeds are certified and treated with fungicides or insecticides to protect them during germination. In South Africa, popular varieties include hybrid canola, which offers better performance and disease resistance.
Sowing Time
The optimal time for sowing canola in South Africa is from late April to June, depending on rainfall patterns. Ensure soil temperatures are between 5°C and 10°C at planting time.
Sowing Depth and Rate
Canola seeds should be planted at a depth of 1.5 to 2 cm to ensure good germination. A seeder equipped with depth control is useful for precision planting. The recommended seeding rate is about 3-5 kg/ha, depending on the variety and soil type. Over-sowing should be avoided to prevent competition between plants.
3. Fertilization and Water Management
Fertilization
Canola is a nutrient-hungry crop that requires a balanced supply of nitrogen (N), phosphorus (P), and potassium (K). Here’s a basic guideline for fertilization:
- Nitrogen: Apply 50-70 kg/ha of nitrogen at planting and a second application of 30-50 kg/ha when the crop reaches the rosette stage (6-8 weeks after planting).
- Phosphorus: Apply 20-30 kg/ha at planting to promote root development.
- Potassium: Apply 15-20 kg/ha if soil tests show a deficiency.
Soil testing is recommended before planting to determine exact nutrient needs and ensure fertilizers are applied appropriately.
Water Requirements
Canola needs consistent moisture, particularly during germination and flowering. In South Africa, it thrives with 350-450 mm of well-distributed rainfall during the growing season. In drier areas, irrigation may be necessary. The crop is sensitive to both drought and waterlogging, so careful water management is essential.
- Germination to Rosette Stage: Ensure moderate moisture during germination and establishment.
- Flowering to Pod-Filling: This is the critical water-demanding stage, and adequate moisture is necessary to ensure good pod formation and seed filling.
4. Growth Stages of Canola
1. Germination (0-14 days)
After planting, seeds will germinate within 4-10 days, depending on soil temperature and moisture. Monitor emergence and ensure good weed control at this stage, as canola is a weak competitor early on.
2. Rosette Stage (3-8 weeks)
The plant forms a rosette of leaves. Nitrogen top-dressing should be done at this stage to boost vegetative growth. Be vigilant for early pests such as aphids and flea beetles, which can damage young plants.
3. Stem Elongation (8-12 weeks)
During this stage, the plant’s stem elongates, and flowering buds form. Apply additional nitrogen if necessary and monitor for signs of pests like diamondback moth larvae or diseases like sclerotinia stem rot.
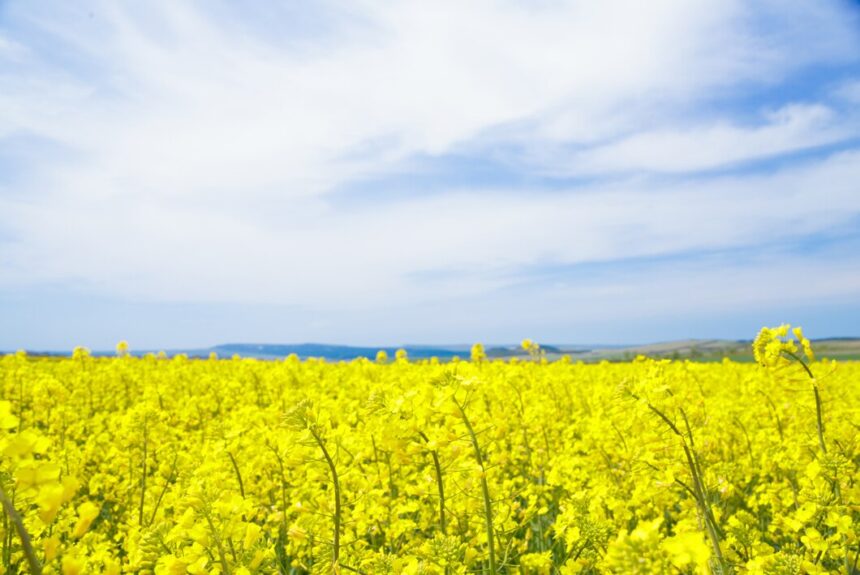
4. Flowering (12-16 weeks)
The plant begins to flower, producing the characteristic yellow canola flowers. This is the most critical stage for moisture management. Be on the lookout for fungal diseases such as blackleg and downy mildew, and consider fungicide applications if necessary.
5. Pod Development and Filling (16-22 weeks)
During pod development, canola seeds begin to form. Continue monitoring for pests such as pod-sucking bugs and apply insecticides as needed. Ensure adequate moisture until the pods reach maturity.
5. Pest and Disease Management
Pests to Watch For
- Aphids: Often attack during early growth stages. Control them with insecticides as soon as they are noticed.
- Flea Beetles: Can cause significant damage to seedlings; use seed treatments or foliar insecticides.
- Diamondback Moth Larvae: These pests chew on leaves and pods. Use targeted insecticides if infestations are severe.
- Pod-Sucking Bugs: These pests damage developing pods, leading to yield losses. Monitor closely and spray if necessary.
Diseases to Watch For
- Blackleg: A fungal disease that can devastate canola crops. Use resistant varieties and consider fungicide applications.
- Sclerotinia Stem Rot: Common in high-humidity areas, this disease can cause wilting and death. Fungicide sprays at the flowering stage can reduce its impact.
- Downy Mildew: Affects young plants. Use fungicides and ensure good field hygiene.
6. Weed Management
Weeds are a major threat to canola, especially in the early stages when plants are small and unable to compete effectively. Herbicide applications should be done pre-emergence or post-emergence, depending on the type of weed and canola variety.
- Pre-emergence Herbicides: Use after planting but before the crop emerges to control broadleaf weeds and grasses.
- Post-emergence Herbicides: Can be applied to control late-emerging weeds.
Ensure that herbicides are compatible with your canola variety to avoid crop damage.
7. Harvesting
Timing
Canola is ready for harvest when 30-40% of the seeds in the pod turn brown. Avoid harvesting too early, as this can lead to poor-quality seeds, and too late, as this can cause seed shattering.
Machinery Required
- Swather: Swathing (cutting the crop and laying it in rows) is commonly used in South Africa to speed up the drying process. Swath the crop when seed moisture is around 30%.
- Combine Harvester: Once the crop has dried to about 8-10% moisture content, use a combine harvester to collect the seeds. Make sure the combine is properly calibrated to avoid shattering and seed loss.
8. Storage
Seed Storage
Canola seeds should be dried to a moisture content of 7-8% before storage to prevent mold and spoilage. Store in a cool, dry place and ensure proper ventilation to maintain seed quality.
Growing canola in South Africa offers farmers a valuable opportunity to diversify their crops and take advantage of a high-demand market. By following best practices in land preparation, fertilization, water management, and pest control, farmers can ensure high yields and a successful harvest. Proper storage techniques are also essential to maintain the quality of the seeds post-harvest. With the right inputs, machinery, and careful attention to each growth stage, canola farming can be a rewarding venture for South African farmers.
Join 'Farmers Mag' WhatsApp Channel
Get the latest Farming news and tips delivered straight to your WhatsApp
CLICK HERE TO JOIN


