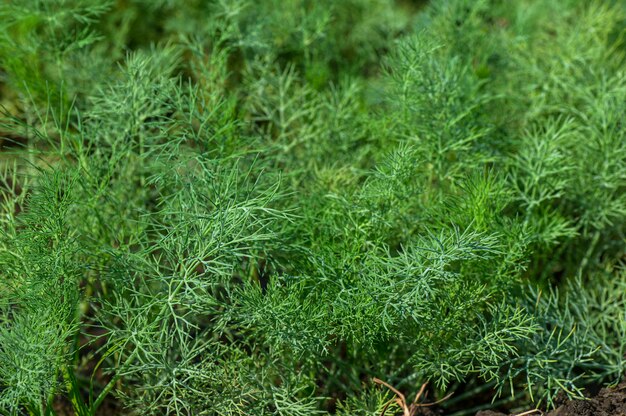
Dill (Anethum graveolens), an aromatic herb popular for its culinary and medicinal uses, is relatively easy to grow and can thrive in various climates, making it an excellent choice for South African farmers. This article outlines the process of growing dill from seed to harvest, covering essential growth stages, required inputs and machinery, common diseases, and best practices for successful cultivation.
1. Land Preparation
Before planting dill, proper land preparation is crucial to create an optimal environment for growth.
- Soil Type: Dill prefers well-drained, loamy to sandy soil with a pH of 5.5 to 6.5. Conduct a soil test to determine nutrient levels and pH.
- Tillage: Use a plow or rotary tiller to break up compacted soil and incorporate organic matter, such as compost or well-rotted manure, to improve soil structure and fertility.
- Weed Control: Remove weeds before planting, as they compete for nutrients and water. You can use a hoe or a cultivator for manual weeding or a mechanical weeder for larger areas.
2. Sowing Seeds
Dill can be directly sown into the ground or started indoors and transplanted later.
- Timing: Sow dill seeds in early spring when the soil temperature reaches about 10°C (50°F). In South Africa, this is typically around September to October.
- Method: Plant seeds 0.5 to 1 cm deep in rows spaced 30 to 45 cm apart. Thin seedlings to 20-30 cm apart to ensure proper air circulation.
- Inputs: Ensure soil is moist during planting. Use a seed drill or sow by hand for smaller plots.
3. Watering
Dill requires consistent moisture, particularly during germination and early growth.
- Water Requirements: Dill typically needs about 2.5 cm of water per week, either from rainfall or irrigation.
- Irrigation Method: Use drip irrigation for efficient water use, reducing the risk of fungal diseases. Water the plants deeply but less frequently to encourage deep root growth.
4. Fertilization
Proper nutrition is vital for healthy dill growth.
- Fertilizers: Before planting, incorporate a balanced fertilizer (N-P-K 10-10-10) at planting time. You can apply an additional side dressing of nitrogen fertilizer (e.g., ammonium nitrate) after 4-6 weeks of growth to promote foliage development.
- Organic Options: Compost tea or fish emulsion can also provide nutrients without the risk of chemical burn.
5. Growth Stages
Dill goes through several growth stages from seed to harvest.
- Germination: Takes about 7-14 days. Ensure consistent moisture and moderate temperatures (15-20°C).
- Seedling Stage: As seedlings emerge, thin them out to allow for adequate space and air circulation.
- Vegetative Stage: Dill develops its characteristic feathery leaves during this stage. Regular watering and pest monitoring are crucial.
- Flowering and Seed Formation: Dill flowers in about 8-10 weeks, attracting beneficial insects. Allow some plants to go to seed for future crops.
6. Pests and Diseases
Monitoring for pests and diseases is essential for successful dill cultivation.
- Common Pests: Aphids, spider mites, and caterpillars can affect dill. Use insecticidal soap or neem oil for pest control when detected.
- Diseases: Watch for powdery mildew, downy mildew, and root rot. Maintain good airflow and avoid overhead watering to reduce disease incidence.
- Pesticide Use: Apply pesticides only as a last resort, following the manufacturer’s instructions. Always check for any pre-harvest intervals.
7. Harvesting Dill
Dill can be harvested at various stages, depending on your intended use.
- Leaf Harvesting: Begin harvesting leaves when they are 15-20 cm tall, usually about 6-8 weeks after sowing. Cut stems above the leaves to encourage bushier growth.
- Seed Harvesting: If allowing some plants to go to seed, wait until the seed heads turn brown and dry. Cut the seed heads and place them in a paper bag to collect seeds as they fall.
8. Storage
Proper storage ensures the quality and flavor of dill is maintained.
- Fresh Dill Storage: Fresh dill can be stored in the refrigerator in a damp paper towel or submerged in water, similar to a bouquet.
- Dried Dill Storage: To dry dill, hang bunches upside down in a cool, dark, well-ventilated area. Once dried, store the leaves in airtight containers away from light and moisture.
Growing dill can be a rewarding endeavor for South African farmers, providing not only a valuable crop for culinary use but also an opportunity to enhance biodiversity on the farm. By understanding each growth stage, employing the right inputs, and being vigilant about pests and diseases, farmers can achieve a successful dill harvest. Whether for local markets or personal use, dill is a versatile herb that can thrive in South Africa’s diverse agricultural landscape.


