Quinoa (Chenopodium quinoa) is a highly nutritious grain known for its resilience in diverse climates and its ability to thrive in marginal soils. With growing global demand for gluten-free and protein-rich grains, quinoa presents an exciting opportunity for South African farmers looking to diversify their crops. This article provides a detailed guide on the process of growing quinoa—from seed to harvest and storage—while addressing the necessary inputs, machinery, and precautions to ensure a successful yield.
1. Land Preparation
Soil Requirements
Quinoa thrives in well-drained soils with a pH of 6.0 to 8.5. While it can tolerate poor, sandy, and even saline soils, it performs best in fertile, loamy soils. Before planting, conduct a soil test to determine pH levels and nutrient content. If needed, lime can be added to increase the pH of overly acidic soils.
Land Preparation
Start by tilling the soil to a depth of 20-30 cm to break up any compacted layers and improve aeration. It’s essential to remove any weeds from the field as quinoa seedlings can be sensitive to competition during early growth stages. A finely prepared seedbed is ideal for promoting even germination.
2. Sowing Seeds
Timing
In South Africa, the best time to plant quinoa is during late spring or early summer, once the soil temperature has reached at least 10°C. However, because quinoa is quite hardy, it can tolerate a range of temperatures, making it suitable for various regions.
Seed Spacing and Depth
Plant quinoa seeds at a depth of 1-2 cm. Spacing between rows should be about 25-40 cm apart, with seeds planted roughly 10 cm apart within the rows. Depending on the variety and region, the plant population should be between 120,000 and 160,000 plants per hectare.
Seeding Methods and Machinery
You can sow quinoa using a conventional seed drill or a precision planter, ensuring proper seed depth and spacing. For smaller farms, broadcasting seeds manually is an option, although it may require thinning the plants later on.
3. Growth Stages
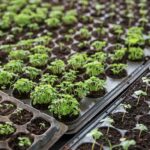
Germination and Seedling Stage (0-14 days)
Quinoa typically germinates within 4-7 days. During this stage, consistent moisture is essential, but avoid waterlogging the soil. Thinning may be necessary if seeds are broadcasted or planted too densely.
Vegetative Stage (2-6 weeks)
The vegetative stage involves rapid growth, during which the plant will produce its first leaves. At this stage, quinoa requires moderate water and nutrients. Weed management is crucial as the crop can struggle to compete with weeds for light and nutrients.
Flowering Stage (7-12 weeks)
Quinoa is a photoperiod-sensitive plant, meaning its flowering is influenced by day length. During the flowering stage, quinoa forms small clusters of flowers, typically in late summer. The plant is drought-tolerant during this period but still benefits from regular moisture.
Grain-Filling Stage (12-16 weeks)
Once flowering is complete, the plant begins to fill the seeds with nutrients. Water requirements decrease during this stage, as excess moisture can lead to seed rot or fungal infections. Depending on the variety and conditions, quinoa will be ready to harvest within 90-120 days from planting.
4. Fertilization
Nutrient Requirements
Quinoa responds well to balanced fertilization, though it does not require high nutrient inputs compared to other grains like maize. The following fertilization guidelines are recommended:
- Nitrogen (N): Apply 60-90 kg/ha of nitrogen at planting to promote vegetative growth. Avoid over-applying nitrogen, as it can cause excessive leaf growth and delay flowering.
- Phosphorus (P): Apply 30-60 kg/ha of phosphorus to support root development and seed production.
- Potassium (K): Potassium is essential for overall plant health, so apply 40-70 kg/ha of potassium.
Organic compost or well-rotted manure can be incorporated into the soil during land preparation to boost soil fertility.
5. Water Requirements and Irrigation
Quinoa is a drought-tolerant crop that can survive on minimal water. However, for optimal yields, it requires moderate irrigation, particularly during the vegetative stage and early flowering. The crop needs around 300-500 mm of water over its growing season. Drip irrigation or overhead sprinklers are effective, but overwatering must be avoided as quinoa is susceptible to root diseases in waterlogged soils.
6. Pest and Disease Management
Although quinoa is generally resistant to pests and diseases, certain threats may arise during its growth stages.
Common Pests
- Aphids: These small sap-sucking insects can damage quinoa plants during the vegetative and flowering stages. Neem oil or insecticidal soap can be used as organic control measures.
- Cutworms: These pests feed on the stems of young plants, causing them to collapse. Baiting or tilling the soil can help reduce their numbers.
Common Diseases
- Downy Mildew: A fungal disease that affects quinoa under wet conditions. It appears as yellow or white patches on the leaves. Use fungicides such as copper-based sprays to control its spread, and ensure good field drainage to prevent the disease.
- Sclerotinia Stem Rot: This fungal disease can affect quinoa when planted in wet or humid conditions. Crop rotation and improved air circulation can help prevent its occurrence.
Herbicide and Pesticide Application
Pre-emergent herbicides can be applied to control weeds during the seedling stage. However, careful selection of herbicides is necessary, as quinoa is sensitive to many broad-spectrum herbicides. For pests like aphids or armyworms, natural or biological insecticides can be used to minimize chemical inputs.
7. Harvesting
Timing
Quinoa is ready for harvest when the leaves dry up, and the seeds harden and change color from green to yellow or red, depending on the variety. The seeds should be firm but not brittle. Harvesting too early can result in reduced yields, while delaying harvest can cause seed shattering.
Harvesting Methods
- Manual Harvesting: For small-scale farmers, quinoa can be harvested manually using sickles. This method is labor-intensive but effective for small plots.
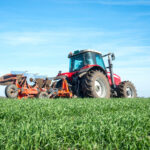
- Mechanical Harvesting: Large-scale farmers can use a combine harvester with minor adjustments for quinoa. Adjust the combine settings to minimize seed damage and loss during harvesting.
8. Post-Harvest Handling and Storage
Drying
After harvest, quinoa seeds must be dried to a moisture content of 10-12% to ensure long-term storage. This can be done by spreading the seeds on a clean surface under the sun or using mechanical dryers for larger quantities.
Threshing and Cleaning
Once dried, quinoa requires threshing to separate the seeds from the plant material. Threshing can be done manually or using small threshers. After threshing, the seeds should be cleaned to remove debris and foreign matter. Winnowing can be done by hand, or farmers can use seed cleaning machines for larger quantities.
Storage
Proper storage is essential to prevent seed degradation or pest infestation. Store quinoa in a cool, dry place, preferably in airtight containers. Adding diatomaceous earth to stored grain can help control storage pests. If possible, store quinoa in a facility with temperature and humidity control to maintain seed quality.
Quinoa offers South African farmers a resilient, nutrient-dense crop with significant market potential. By understanding the various growth stages—from seed selection and land preparation to irrigation, fertilization, pest management, and harvesting—farmers can achieve successful quinoa production. As the demand for gluten-free, protein-rich grains continues to rise globally, quinoa presents an exciting opportunity for both small-scale and commercial farmers across South Africa.
Join 'Farmers Mag' WhatsApp Channel
Get the latest Farming news and tips delivered straight to your WhatsApp
CLICK HERE TO JOIN