Broccoli, known for its nutritional value and high market demand, can be a lucrative crop for South African farmers. However, successful broccoli cultivation requires careful management at every growth stage, from seed selection to harvest and storage. In this guide, we’ll cover the entire process, focusing on the necessary inputs, machinery, soil requirements, watering needs, pest and disease management, and the use of fertilizers.
1. Land Preparation
a) Soil Type
Broccoli thrives in well-drained, fertile loamy or sandy loam soils with a pH between 6.0 and 7.5. Testing the soil before planting is essential to determine its pH level and nutrient content. Amend acidic soils with lime to achieve the ideal pH.
b) Land Preparation Steps
- Tillage: Start by deep plowing or tilling the land to a depth of about 20-30 cm to ensure proper soil aeration and root penetration.
- Soil Conditioning: Add organic matter like compost or well-rotted manure to improve soil structure and water retention. Use a tractor with a rotary tiller attachment to mix the compost evenly into the soil.
- Ridge Formation: Create raised beds or ridges, which help in drainage and prevent waterlogging—especially important in areas prone to heavy rainfall like KwaZulu-Natal or the Eastern Cape.
2. Sowing and Germination
a) Seed Selection
Choose disease-resistant broccoli varieties that are well-suited to your region’s climate. Some popular varieties in South Africa include Green Sprouting Calabrese and Parthenon.
b) Sowing Process
Broccoli is typically grown from seeds, either by direct seeding or transplanting seedlings. In South Africa, it is best to sow seeds in early autumn or spring, depending on the region’s climate. For areas with mild winters like the Western Cape, planting can extend into winter.
- Seedlings: Start seeds in trays filled with a sterile seedling mix. Place them in a greenhouse or a shaded area to encourage healthy germination.
- Transplanting: After 4-6 weeks, once seedlings have 4-5 true leaves, they are ready for transplanting into the field. Space the seedlings 45-60 cm apart with rows 75 cm apart.
3. Watering Requirements
Broccoli requires a consistent supply of moisture throughout its growing season, as uneven watering can result in poor head development and reduced yield.
a) Water Amount and Frequency
- Soil Moisture: Maintain moist, but not waterlogged, soil.
- Frequency: Water deeply once or twice a week depending on rainfall and soil conditions. In drier regions like the Northern Cape, a drip irrigation system can help ensure consistent moisture levels. Avoid wetting the leaves to reduce disease risk.
4. Fertilizer Application
Broccoli is a heavy feeder, so it requires adequate nutrients for optimal growth.
a) Pre-Planting Fertilization
- Base Dressing: Apply a basal fertilizer rich in phosphorus (e.g., 2:3:4 NPK) to support root development. For a hectare, you may need 500-700 kg of fertilizer depending on soil tests.
b) Post-Planting Fertilization
- Top Dressing: Once seedlings are established, apply a nitrogen-rich fertilizer (e.g., LAN 28% N) 3-4 weeks after transplanting. A second application may be needed 2-3 weeks later to promote leaf and head growth.
- Micro-nutrients: Supplement with calcium and boron, which are essential for head formation.
5. Growth Stages of Broccoli
a) Seedling Stage (0-4 weeks)
During this phase, focus on keeping seedlings warm and ensuring they receive adequate light and water. Once the seedlings reach 4-6 true leaves, they are ready for transplanting.
b) Vegetative Stage (4-8 weeks)
After transplanting, the plant enters a rapid vegetative growth phase. During this stage, ensure consistent watering and apply top dressings of nitrogen fertilizer to promote leaf development.
c) Head Development Stage (8-12 weeks)
The formation of broccoli heads occurs 8-12 weeks after planting. Monitor the plants closely, ensuring they receive adequate nutrients and water to encourage the growth of large, dense heads.
d) Maturity and Harvest (12-16 weeks)
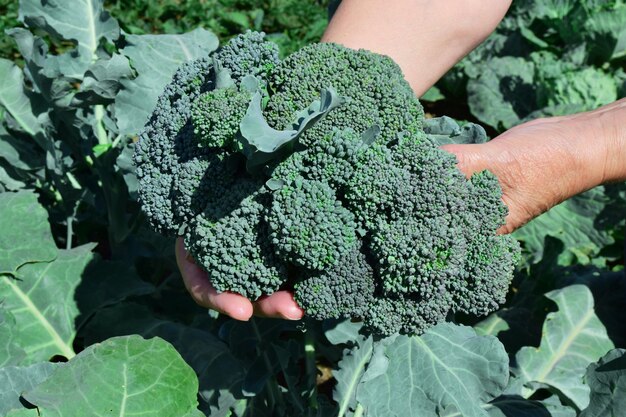
Broccoli is ready for harvest once the heads are tight and firm, typically 12-16 weeks after planting. Harvest in the early morning when the heads are cool. Use a sharp knife to cut the heads at the base, leaving several inches of stem. Side shoots may develop after the main head is harvested, offering additional yield.
6. Pest and Disease Management
a) Pests
- Aphids: These small insects suck sap from the plant, leading to curled and yellow leaves. Use insecticidal soap or neem oil to control aphid populations.
- Cabbage Worms and Loopers: These caterpillars feed on leaves and heads, causing extensive damage. Handpick caterpillars or apply Bacillus thuringiensis (Bt) as a natural pesticide.
- Cutworms: These pests target young seedlings, cutting them off at ground level. Prevent by placing protective collars around seedlings or using organic insecticides.
b) Diseases
- Downy Mildew: A fungal disease that causes yellow spots on leaves. Use copper-based fungicides and ensure proper spacing between plants to improve air circulation.
- Clubroot: A soil-borne disease that affects the roots, causing swelling and stunted growth. Prevent by maintaining soil pH above 7.0 and rotating crops with non-cruciferous plants.
- Black Rot: Characterized by yellowing and blackening of the veins in leaves. Avoid overhead irrigation and use disease-free seed to minimize the risk.
7. When to Use Pesticides or Herbicides
a) Pesticide Application
Pesticides should be applied as soon as pest infestations are observed. Choose organic options like neem oil or Bt for environmentally friendly control. Chemical insecticides can be used for severe infestations but always follow the recommended withdrawal period before harvesting to avoid chemical residues on the crop.
b) Herbicide Application
Weed control is essential in broccoli fields, especially during the early growth stages. Apply pre-emergence herbicides after planting but before germination to prevent weed growth. During the growing season, hand weeding or mechanical weeding is recommended to avoid competition for nutrients.
8. Harvesting and Storage
a) Harvest Timing
Harvest broccoli heads when they are fully developed but before the florets begin to open and turn yellow. Cut the heads with 10-15 cm of stem to extend their shelf life.
b) Post-Harvest Handling
After harvesting, cool the broccoli heads immediately to preserve freshness. Store them at 0°C with high humidity (95-100%) to prolong shelf life. Proper cooling and storage can extend the shelf life to 2-3 weeks, which is essential for transporting produce to distant markets.
9. Machinery and Tools Needed
- Tractors for land preparation and ridge formation.
- Seedling trays and greenhouse covers for raising young plants.
- Irrigation systems, preferably drip irrigation, for efficient water use.
- Knapsack sprayers for applying pesticides and foliar feeds.
- Hand tools like hoes for weeding and harvesting knives for cutting heads.
Growing broccoli in South Africa offers farmers a profitable venture, but it requires careful attention to soil preparation, water management, nutrient application, and pest control. By following these guidelines and using sustainable farming practices, South African farmers can ensure a healthy crop with high yields, meeting the increasing demand for broccoli in local and export markets. Proper storage and handling techniques will also help maintain quality, ensuring that your produce reaches the market in peak condition.
Join 'Farmers Mag' WhatsApp Channel
Get the latest Farming news and tips delivered straight to your WhatsApp
CLICK HERE TO JOIN