Wheat is a crucial crop for food security and agriculture in South Africa. Successfully growing wheat requires understanding the entire process from planting to harvest, including land preparation, inputs, pest and disease management, and proper storage. This guide provides detailed information on each growth stage of wheat, necessary inputs and machinery, common infections and diseases, and best practices for fertilization, irrigation, and soil management.
1. Land Preparation
a. Soil Types: Wheat grows best in well-drained loam or sandy loam soils with a pH between 6.0 and 7.0. Heavy clay soils should be avoided as they can lead to poor root development and waterlogging.
b. Soil Testing: Conduct a soil test to determine nutrient levels and pH. Amend the soil based on test results to ensure optimal growing conditions.
c. Tillage: Prepare the seedbed by plowing or discing to a depth of about 20-25 cm. This improves soil aeration, reduces compaction, and helps in weed control. Level the field to ensure uniform seed placement.
d. Fertilization: Apply a balanced fertilizer (e.g., 2:3:2) before planting to supply essential nutrients. Incorporate the fertilizer into the soil during tillage.
2. Planting
a. Timing: In South Africa, wheat is typically planted between May and June, depending on the region. Ensure planting is done before the onset of the coldest weather.
b. Seed Selection: Choose high-quality, disease-resistant wheat varieties suited to local conditions. Consider both hard and soft wheat types depending on the intended use.
c. Planting Depth: Sow seeds at a depth of 3-5 cm. Planting too deep can affect germination, while planting too shallow can expose seeds to pests and diseases.
d. Spacing: Space rows 15-20 cm apart and plant seeds 2-5 cm apart within rows. Proper spacing improves air circulation and reduces competition.
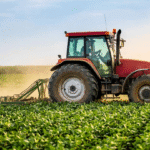
e. Machinery: Use a seed drill for uniform planting and efficient seeding. Ensure the drill is calibrated for the desired seed rate.
3. Growth Stages
a. Germination: Seeds will germinate within 7-10 days. Ensure the soil remains consistently moist during this period.
b. Tillering: This stage occurs about 2-3 weeks after germination. Wheat plants develop additional shoots or tillers, which contribute to overall yield. Adequate nutrients and water are crucial during this phase.
c. Stem Elongation: As the plant grows, it enters the stem elongation stage, which leads to increased height. Ensure the plants have sufficient support and nutrients.
d. Heading: Around 60-70 days after planting, the wheat plants will start to form heads. This is the stage where the flower structures develop into wheat grains.
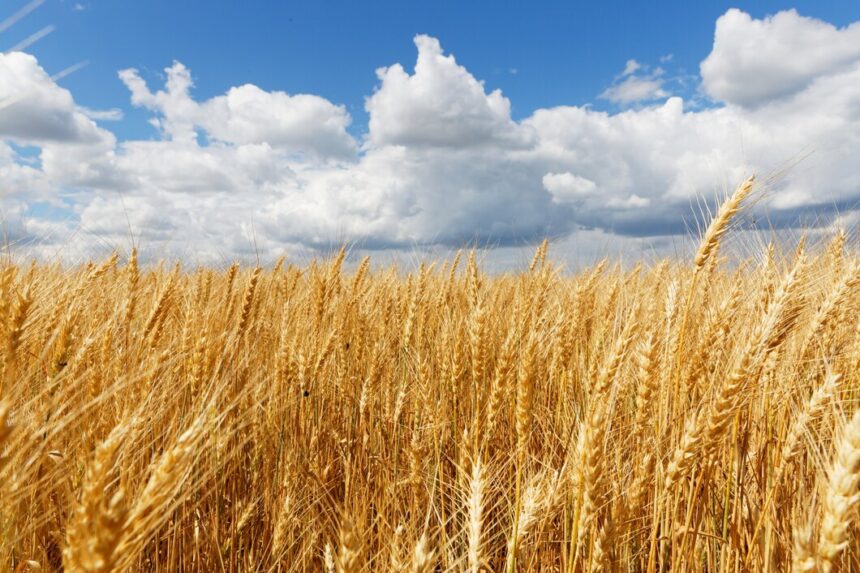
e. Maturity: The wheat reaches maturity when the grains are firm and the stems turn yellow or brown. Harvest when the moisture content is around 14-20%.
4. Irrigation
a. Water Requirements: Wheat requires about 450-600 mm of water throughout its growing season. The exact amount varies based on soil type and climatic conditions.
b. Irrigation Schedule: Use a combination of rainwater and supplementary irrigation as needed. Water the crop during critical growth stages, such as germination and heading.
c. Machinery: Use irrigation systems like pivots, drippers, or sprinklers to provide adequate water. Ensure efficient water application to avoid wastage.
5. Pest and Disease Management
a. Common Pests: Monitor for pests like aphids, wheat stem sawflies, and grasshoppers. Use integrated pest management (IPM) strategies, including biological controls and targeted pesticide applications.
b. Diseases: Watch for diseases such as rusts (leaf, stem, and yellow rust), Fusarium head blight, and powdery mildew. Use resistant varieties and apply fungicides as needed. Ensure proper crop rotation to reduce disease pressure.
c. Herbicides: Apply herbicides to control weeds, especially during the early stages of growth. Use pre-emergent herbicides to prevent weed establishment and post-emergent herbicides for established weeds. Follow manufacturer recommendations for application rates and timings.
6. Harvesting
a. Timing: Harvest when the wheat is fully mature, and the grains are dry. Delay harvesting if moisture content is too high, as this can lead to poor grain quality.
b. Machinery: Use a combine harvester to efficiently reap, thresh, and clean the wheat. Ensure the machine is well-maintained and adjusted for optimal performance.
7. Storage
a. Drying: After harvest, dry the wheat to reduce moisture content to about 12-14%. Use drying facilities or sun-dry the grains if necessary.
b. Storage Facilities: Store wheat in clean, dry, and well-ventilated bins or silos. Ensure the storage area is free of pests and contaminants.
c. Pest Control: Regularly inspect stored wheat for signs of insect infestations. Use appropriate pest control measures, such as fumigation or insecticides, if necessary.
Growing wheat involves careful planning and management from land preparation to harvest and storage. By understanding each growth stage, managing inputs effectively, and addressing pests and diseases, South African farmers can achieve successful wheat production. Adopting best practices in soil management, irrigation, and pest control will enhance yield and ensure a high-quality harvest.
Join 'Farmers Mag' WhatsApp Channel
Get the latest Farming news and tips delivered straight to your WhatsApp
CLICK HERE TO JOIN