Efficient and consistent crop planting is essential for maximizing yields and reducing labor costs. A seeder, whether manual, mechanical, or automated, is a valuable tool for achieving uniform seed spacing and depth. South African farmers, from small-scale growers to commercial producers, can benefit from using a seeder to improve planting accuracy. Here’s a guide on how to use a seeder effectively.
What is a Seeder?
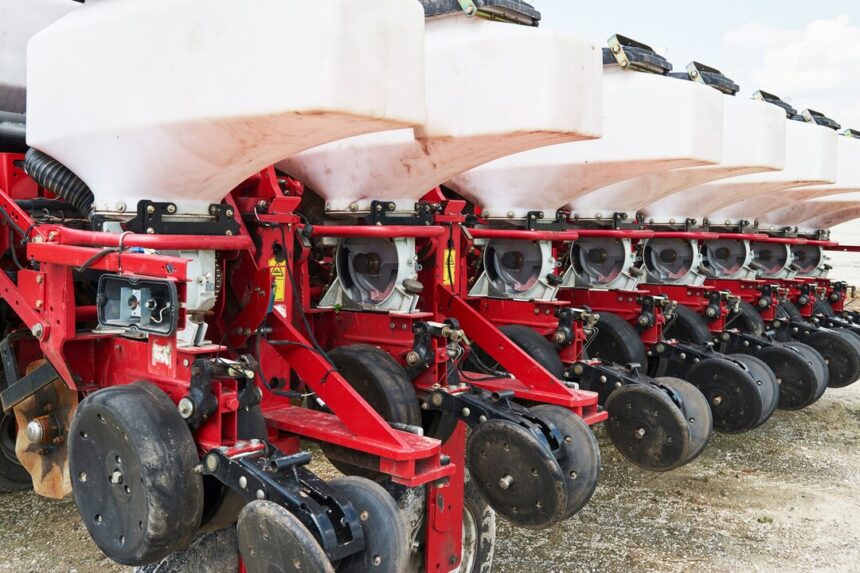
A seeder is an agricultural implement designed to sow seeds at precise intervals and depths. Seeders come in various types, including:
- Manual Seeders: Operated by hand and suitable for small-scale farming.
- Mechanical Seeders: Require animal or tractor power and are ideal for medium-scale farms.
- Automatic or Pneumatic Seeders: Use advanced technology for large-scale farming, ensuring precision planting.
Benefits of Using a Seeder
- Consistency: Ensures even seed spacing and depth, promoting uniform growth.
- Time-Saving: Reduces the time required for planting compared to manual methods.
- Cost-Effective: Minimizes seed wastage and labor costs.
- Improved Yields: Uniform planting optimizes nutrient and water availability for each plant.
Steps to Use a Seeder for Consistent Planting
1. Choose the Right Seeder
Select a seeder based on your farm’s size, crop type, and budget. For example:
- Use a manual seeder for vegetable crops in small plots.
- Opt for a mechanical seeder for maize, wheat, or other grains on medium-sized farms.
- Consider an automated seeder for large-scale commercial operations.
2. Calibrate the Seeder
Before planting, calibrate the seeder to ensure accurate seed spacing and depth:
- Adjust the seed plate or metering system to match the size and shape of the seeds.
- Set the depth gauge to plant seeds at the recommended depth for your crop.
- Test the seeder on a small section to confirm the settings are correct.
3. Prepare the Soil
Proper soil preparation is crucial for consistent planting:
- Plow, till, and level the soil to create a smooth seedbed.
- Remove rocks, weeds, and debris that could obstruct the seeder.
- Ensure the soil has adequate moisture to facilitate germination.
4. Load the Seeder
Fill the seed hopper with high-quality seeds. Make sure the seeds are clean and free from debris to prevent clogging. For coated or treated seeds, check compatibility with the seeder.
5. Operate the Seeder
Follow these steps for efficient operation:
- Attach the seeder to the tractor or prepare the manual seeder for use.
- Start at one end of the field and move in straight lines to ensure even coverage.
- Maintain a consistent speed to avoid uneven planting.
6. Monitor the Seeder During Planting
Keep an eye on the seeder’s performance as you plant:
- Check that seeds are being dropped at the correct intervals.
- Ensure there are no blockages in the seed tubes or hopper.
- Refill the hopper when needed without overloading it.
7. Inspect the Field After Planting
Once planting is complete:
- Walk through the field to confirm even seed placement and depth.
- Look for areas where seeds may have been skipped or planted too close together.
- Adjust the seeder settings if necessary for future planting.
Tips for Optimizing Seeder Performance
- Match Seeder to Crop: Use seed plates or discs specifically designed for the crop you are planting.
- Maintain the Seeder: Clean and lubricate the seeder regularly to prevent wear and tear.
- Consider Field Conditions: Adjust settings based on soil type, moisture, and terrain.
- Train Operators: Ensure that anyone operating the seeder is properly trained to maximize efficiency.
Using a seeder is a practical and efficient way to achieve consistent crop planting, whether you are farming in Gauteng’s fertile regions or the arid landscapes of the Northern Cape. By selecting the right seeder, calibrating it correctly, and following best practices, you can enhance planting accuracy, reduce costs, and boost yields. Investing in a seeder is not just a step toward modernization but also a key to sustainable and profitable farming.


