The Eastern Cape province of South Africa is known for its diverse agricultural landscape, with a variety of crops being cultivated due to its temperate climate and fertile soil. Among these crops, wheat holds a prominent position as one of the most important cereal grains grown in the region. For beginners looking to start wheat farming in the Eastern Cape, it’s crucial to understand the specific conditions and steps required to succeed in this agricultural venture.
In this guide, we’ll walk you through the essential aspects of wheat farming in the Eastern Cape, from choosing the right variety to harvesting your crop. Whether you’re a novice or have some experience in farming, this step-by-step approach will help set you on the path to a successful wheat farming business.
1. Understanding the Eastern Cape Climate for Wheat Farming
Wheat is a temperate crop, meaning it thrives in areas with moderate rainfall and temperatures. The Eastern Cape provides an ideal environment for wheat farming, especially in regions like the Gamtoos Valley, the Sundays River Valley, and parts of the Baviaanskloof.
- Rainfall: Wheat requires a consistent, moderate amount of rainfall (between 450mm to 600mm annually). In areas where rainfall is insufficient, irrigation may be necessary.
- Temperature: Ideal temperatures for wheat growth range between 15°C and 20°C during the growing season. The Eastern Cape’s relatively mild winters offer the perfect growing conditions for wheat.
However, due to climate variability, it’s essential to monitor local weather patterns and plan accordingly to avoid crop loss from droughts or unexpected frost.
2. Choosing the Right Wheat Variety
Selecting the right wheat variety is crucial to ensure a successful harvest. There are two main types of wheat: bread wheat and durum wheat, with bread wheat being the most commonly grown in South Africa.
- Bread Wheat Varieties: These varieties are suitable for the production of flour used in baking. Common varieties include PAN 3090, PAN 3171, and Triticum aestivum. These varieties are well-suited for the Eastern Cape’s climatic conditions and are high-yielding, resistant to diseases, and adaptable to different soil types.
- Durum Wheat Varieties: This variety is primarily used for making pasta. Durum wheat requires warmer temperatures for optimal growth but is less commonly grown in the Eastern Cape compared to bread wheat.
Work with a local agricultural advisor or seed supplier to choose a variety that’s best suited to your specific area within the Eastern Cape.
3. Preparing the Land for Wheat Farming
Before planting wheat, proper land preparation is crucial to ensure optimal growth. Here are the essential steps for preparing your land:
- Soil Testing: Conduct a soil test to determine the pH level, nutrient content, and texture of the soil. Wheat prefers well-drained, loamy soil with a pH of around 6.0 to 7.0. If your soil is acidic, consider applying lime to balance the pH.
- Tillage: Ploughing and harrowing are essential to break up soil clumps and create a fine seedbed. This helps improve soil aeration and allows roots to grow more easily. If you’re growing wheat on land that hasn’t been cultivated before, you may need to do deeper plowing.
- Fertilization: Wheat requires nutrients like nitrogen (N), phosphorus (P), and potassium (K) for healthy growth. Use a balanced fertilizer based on the results of your soil test. Starter fertilizers are also recommended at planting to give your crop a good start.
- Weed Control: Wheat is sensitive to competition from weeds, so controlling weeds before planting is essential. Herbicides can be used, but ensure that the ones you use are safe for wheat.
4. Planting Wheat: Timing and Method
In the Eastern Cape, wheat is typically planted between May and June, just before the start of winter, allowing the crop to grow during the cooler months and be harvested in spring or early summer.
- Planting Depth: Wheat seeds should be sown at a depth of 3 to 5 cm. Planting too shallow can lead to poor germination, while planting too deep can reduce seedling emergence.
- Row Spacing: Wheat is usually planted in rows with a spacing of around 17 to 25 cm between rows. This allows for optimal growth and air circulation, reducing the risk of fungal diseases.
- Seeding Rate: Depending on the variety and soil type, the recommended seeding rate is around 80 to 120 kg per hectare. This rate can vary, so it’s essential to check with local agronomists for precise recommendations.
5. Irrigation Management
Although the Eastern Cape generally experiences moderate rainfall, it is essential to plan for irrigation, especially in regions with low rainfall. Wheat requires about 450 to 500mm of water over its growing season. Effective irrigation is essential to avoid crop stress during dry periods, especially during flowering and grain filling.
- Drip Irrigation: For more efficient water use, drip irrigation is often recommended for wheat. It helps direct water precisely where it’s needed, minimizing evaporation and runoff.
- Center Pivot Irrigation: In larger-scale operations, center pivot systems may be used to water wheat fields more efficiently.
Ensure that your irrigation system is well-maintained, as water stress can significantly reduce yields.
6. Pest and Disease Management
Wheat farming is susceptible to a variety of pests and diseases that can reduce yield and quality. Some common issues include:
- Fungal Diseases: Wheat is vulnerable to diseases like powdery mildew, rust, and Septoria leaf blotch. Use fungicides as part of a preventive management plan, and ensure good air circulation around the crop by controlling weed growth.
- Insect Pests: Common pests like aphids and armyworms can damage wheat. Regularly scout your fields and apply insecticides as needed. Be sure to follow proper application guidelines to avoid resistance.
7. Harvesting Wheat
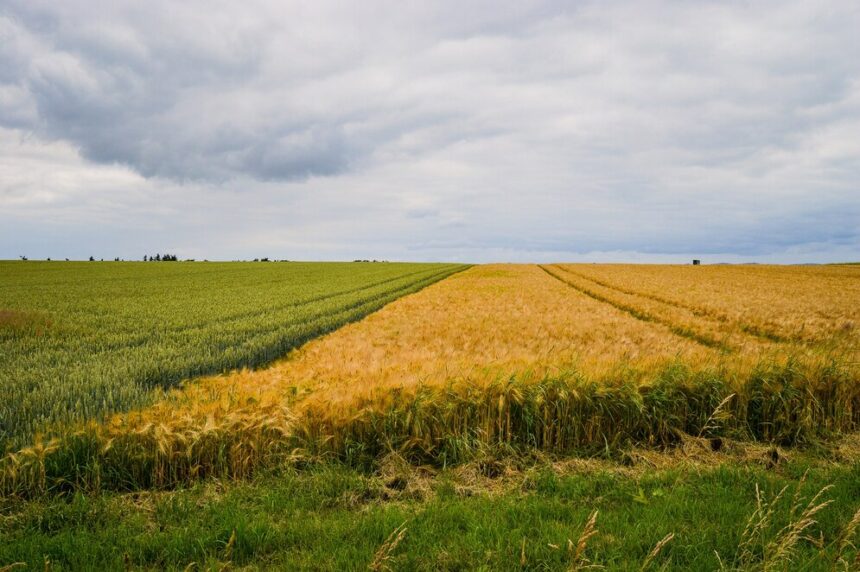
Wheat is usually ready for harvest in November or December when the plants have matured, and the grains have turned golden brown. To check if your wheat is ready for harvest:
- Test Grain Hardness: Squeeze a grain between your fingers; it should feel firm.
- Moisture Content: Ideal moisture content for harvesting wheat is around 12% to 14%. If the wheat is too wet, it may spoil during storage. Consider using a grain moisture meter to ensure accurate measurements.
- Harvesting Method: Wheat is typically harvested using a combine harvester, which efficiently cuts and threshes the grain. Be sure to harvest in dry conditions to avoid grain damage.
8. Post-Harvest Storage and Marketing
After harvesting, it’s essential to store your wheat properly to prevent spoilage and maintain its quality. Store the grain in well-ventilated, dry storage facilities, such as silos. Keep the moisture content in check, as high moisture can lead to mold and fungal growth.
When marketing your wheat, consider local cooperatives, mills, or even export markets, as the demand for quality wheat is high in both local and international markets.
Wheat farming in the Eastern Cape offers promising opportunities for beginners willing to invest time, knowledge, and effort into learning the intricacies of the process. By choosing the right variety, preparing your land, managing irrigation, and tackling pests and diseases, you can set the foundation for a successful wheat farming venture.
With patience and careful planning, wheat farming can provide a rewarding and profitable experience in one of South Africa’s most fertile agricultural regions.
Join 'Farmers Mag' WhatsApp Channel
Get the latest Farming news and tips delivered straight to your WhatsApp
CLICK HERE TO JOIN