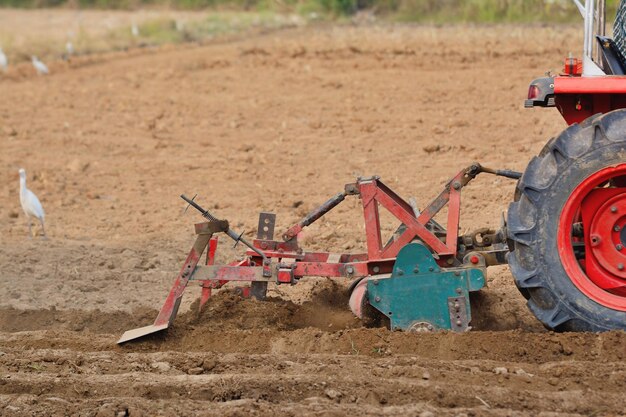
Preparing your soil for planting is a fundamental step in ensuring a healthy and productive crop yield. One of the most effective ways to break up compacted soil, control weeds, and create a suitable seedbed is by using a plough. Ploughing helps to aerate the soil, improve water infiltration, and mix organic matter into the ground. Here’s a guide on how to properly use a plough to prepare your soil for planting.
1. Choosing the Right Plough for Your Soil Type
Before you start ploughing, it’s essential to choose the right type of plough for your soil. Different soils require different approaches:
- Mouldboard Plough: This is the most common type of plough, suitable for heavy, clayey soils. It turns over the soil and buries crop residue, providing excellent aeration.
- Chisel Plough: Ideal for deeper tillage and breaking up compacted layers, especially in sandy or loamy soils.
- Disc Plough: Best for soils with large amounts of residue, as it cuts through crop remnants and is ideal for medium to heavy soils.
Assess your soil texture and structure before choosing the right plough to ensure it matches the needs of your land.
2. Preparing the Plough
Once you’ve selected the appropriate plough for your soil, the next step is to ensure it’s properly set up and adjusted for optimal performance:
- Check the depth: The plough should be set to the desired depth of tillage, which is typically 6 to 8 inches for most crops. Deeper tilling may be required for root crops like potatoes.
- Adjust the angle: The angle of the plough’s blades determines how much soil is turned. Make sure the angle is set correctly to achieve the right soil turnover.
- Inspect the ploughing blades: Ensure the plough blades are sharp and free of damage. Dull blades can result in poor soil turnover and increased fuel consumption.
3. Ploughing the Field
Now that the plough is ready, it’s time to start ploughing the field. Here’s a step-by-step process to ensure effective soil preparation:
Step 1: Begin on the Edge of the Field
Start ploughing along the edge of the field in a straight line. This will serve as your first furrow. Always plough in a consistent direction to avoid unnecessary turns that could disrupt the soil.
Step 2: Plough in Overlapping Passes
After completing the first furrow, move the plough slightly over to ensure that you are covering the entire field. Each pass should slightly overlap the previous one to ensure even coverage and prevent the soil from being left untouched. The depth of the furrows should remain consistent throughout the process.
Step 3: Maintain Steady Speed
While ploughing, maintain a steady speed to ensure the plough can operate efficiently. Too slow a speed can cause excessive dragging and uneven ploughing, while too fast can result in shallow furrows and ineffective soil turnover. Adjust the tractor’s speed based on soil conditions.
Step 4: Turn the Soil Consistently
As you plough, the mouldboard should flip the soil at a consistent depth. This helps in turning over the soil, aerating it, and burying any weeds or crop residues. A good practice is to aim for soil turnover where the old soil is buried and fresh soil is brought to the surface.
4. Dealing with Obstacles
Sometimes, obstacles such as rocks, tree roots, or stumps may be encountered during ploughing. If these are small, you can usually plough around them, but larger obstacles may require additional equipment or manual removal. Make sure to inspect the field beforehand and clear any major obstructions to avoid damaging your plough or tractor.
5. Leveling the Soil After Ploughing
After ploughing, the soil may look uneven, with furrows and ridges scattered throughout. To prepare the soil for planting, it’s important to level the field. This can be done using a harrow or a drag after ploughing. These tools break up clods of soil, smooth out the surface, and create a fine seedbed ideal for planting.
6. Soil Fertility and Moisture Management
Once the soil is ploughed and leveled, take the time to assess its fertility and moisture content. Adding organic matter or fertilizers, if needed, can enhance soil quality and provide essential nutrients for your crops. It’s also important to consider irrigation or rainfall to ensure the soil is moist enough for seed germination.
7. Waiting for Ideal Planting Conditions
After ploughing and leveling, the soil will need to rest for a period, depending on your climate and the type of crop you’re planting. Allowing the soil to dry slightly can improve seedbed conditions and prevent compaction when planting.
Ploughing is a crucial step in soil preparation, helping to break up compacted ground, control weeds, and create a fertile seedbed. By using the right plough for your soil, adjusting it correctly, and following a systematic approach, you can ensure your soil is well-prepared for successful planting. Properly prepared soil leads to better crop growth, higher yields, and more efficient farming operations.
Join 'Farmers Mag' WhatsApp Channel
Get the latest Farming news and tips delivered straight to your WhatsApp
CLICK HERE TO JOIN


