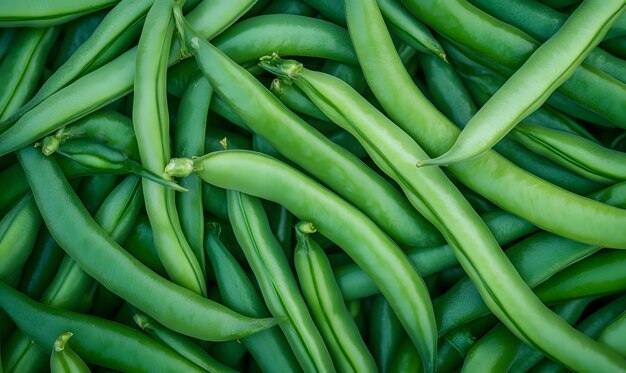
Green beans, also known as string beans or snap beans, are a popular crop in South Africa due to their high market demand and versatility in the kitchen. Whether you’re a smallholder or commercial farmer, understanding the process of growing green beans, from seed to harvest and storage, is key to ensuring a successful yield. This article covers each growth stage, the necessary inputs, machinery, common diseases and pests, and other essential tips for growing green beans.
1. Land Preparation
Soil Requirements
Green beans thrive in well-drained, fertile soils with a pH range of 6.0 to 7.5. Sandy loam and loamy soils are ideal, as they offer good drainage while retaining enough moisture. Heavy clay soils should be avoided or improved with organic matter to prevent waterlogging, which can hinder seed germination and plant growth.
Land Preparation Process
- Ploughing and Harrowing: Begin by ploughing the field to a depth of about 15-20 cm to break up the soil. Use a disc harrow to break down large clods, ensuring a smooth, fine tilth that encourages good root penetration.
- Soil Testing and Fertilization: Before planting, conduct a soil test to determine nutrient deficiencies. Based on the results, apply a balanced fertilizer (e.g., 2:3:4 NPK ratio) at the rate of 300–500 kg per hectare. If the soil is acidic, lime can be added to adjust the pH level.
2. Planting Green Beans
Seed Selection and Sowing
Choose disease-resistant green bean varieties that are suitable for your region. Plant certified seeds to reduce the risk of diseases and ensure higher yields.
- Planting Time: In South Africa, green beans are generally planted from late spring to early summer (September to November), depending on the region and climate. They can also be grown year-round in areas with frost-free winters.
- Seed Spacing and Depth: Plant seeds 2.5 cm deep, spaced 7-10 cm apart in rows that are 40-50 cm apart. This spacing promotes good air circulation and light penetration, which are essential for healthy growth.
Machinery Required
For large-scale farming, mechanized planters and tractors equipped with seed drills are useful for evenly planting the seeds across large fields. Smallholders can opt for manual planting.
3. Irrigation and Water Requirements
Green beans require consistent moisture for optimal growth, especially during flowering and pod development. Drip irrigation is recommended as it delivers water directly to the root zone, conserving water while preventing waterlogging. Sprinkler systems can also be used but should be monitored to avoid leaf wetness, which can encourage fungal diseases.
- Water Frequency: Green beans need approximately 25-30 mm of water per week. Increase irrigation during dry spells or reduce it when there’s sufficient rainfall.
4. Fertilization During Growth
- Nitrogen (N): Green beans are nitrogen-fixing plants, which means they produce their own nitrogen with the help of rhizobia bacteria. However, adding a small amount of nitrogen-rich fertilizer (50-100 kg/ha) at the early vegetative stage can promote strong, healthy growth.
- Phosphorus (P) and Potassium (K): Apply phosphorus to encourage root development and potassium to improve disease resistance and pod quality. A side-dressing of 100-200 kg/ha of 2:3:4 NPK fertilizer during flowering can enhance productivity.
5. Growth Stages of Green Beans
1. Germination (5-10 days after planting):
The seed absorbs moisture and begins to sprout. Ensure the soil is consistently moist but not waterlogged.
2. Seedling Stage (10-20 days):
Small leaves begin to emerge, and the plant starts to photosynthesize. Weeding is critical at this stage to prevent competition for nutrients.
3. Vegetative Growth (20-30 days):
The plant grows rapidly, producing more leaves and stems. Apply a second round of fertilization at this stage to support growth.
4. Flowering (30-40 days):
The plant produces flowers, which later develop into pods. Ensure consistent watering during this period to avoid flower drop.
5. Pod Development and Harvest (40-60 days):
Pods grow and mature, becoming ready for harvest 10-14 days after flowering. Harvesting should be done every 2-3 days to ensure pods are tender and to promote continuous production.
6. Pests and Diseases
Common Pests:
- Aphids: These tiny insects feed on plant sap and can cause yellowing of leaves. Use insecticidal soap or neem oil for control.
- Bean Beetles: They feed on the leaves and pods. Apply insecticides such as pyrethroids when you notice significant damage.
- Cutworms: These pests can cut seedlings at the base. Control them using biological pesticides or chemical treatments like carbaryl.
Common Diseases:
- Root Rot (Pythium spp.): This fungal disease thrives in poorly drained soils. Improve drainage and avoid overwatering to prevent it.
- Anthracnose: A fungal infection that causes dark lesions on leaves and pods. Use resistant seed varieties and fungicides like copper oxychloride.
- Rust: This is a fungal disease characterized by orange-brown spots on the leaves. Apply fungicides as soon as symptoms appear.
7. When to Use Pesticides and Herbicides
- Pesticides: Use insecticides and fungicides only when pest and disease pressure is high. Regular scouting for pests and diseases is crucial to applying control measures at the right time.
- Herbicides: Herbicides can be used to control weeds in the early growth stages. Pre-emergent herbicides like pendimethalin can be applied before planting, while post-emergent herbicides such as glyphosate can control weeds after they emerge.
8. Harvesting Green Beans
Green beans are typically ready for harvest 50-60 days after planting. Harvest the pods when they are young and tender, before the seeds inside fully mature. Use your hands or mechanized harvesters to pick the beans every 2-3 days to maintain the quality of the crop and extend the harvest season.
9. Post-Harvest Handling and Storage
After harvesting, green beans should be cooled quickly to preserve their freshness. They can be stored at 5-7°C with high humidity to prevent dehydration. For long-term storage, green beans can be frozen or canned. Ensure proper sorting and grading before packaging for sale.
Growing green beans in South Africa can be highly rewarding when done correctly. By understanding the key stages of growth, selecting the right inputs, managing pests and diseases, and practicing efficient irrigation, farmers can achieve high yields and good-quality produce. With proper planning and attention to detail, you can ensure a successful green bean farming venture that meets both local and export market demands.
Join 'Farmers Mag' WhatsApp Channel
Get the latest Farming news and tips delivered straight to your WhatsApp
CLICK HERE TO JOIN