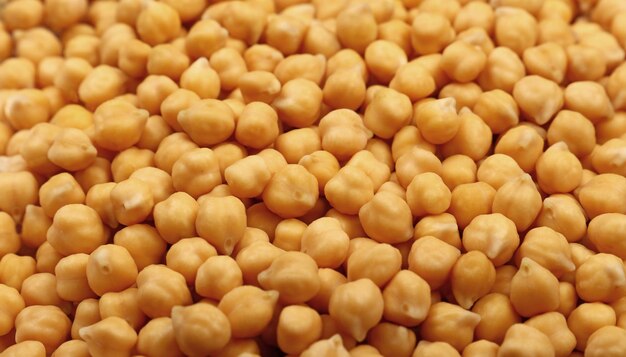
Chickpeas, also known as garbanzo beans, are gaining popularity among South African farmers due to their resilience, ability to thrive in various climates, and high nutritional value. This legume is a rich source of protein and fiber, making it a sought-after crop for both local consumption and export. Growing chickpeas successfully requires a clear understanding of each stage of the growth process, from planting to harvest and storage. Below is a comprehensive guide tailored to South African farmers.
1. Land Preparation
Proper land preparation is crucial for chickpea farming. Chickpeas perform best in well-drained, loamy soils with a neutral pH (6-7). They can also tolerate sandy soils but struggle in waterlogged or clay-heavy soils. Preparing the land involves several steps:
- Ploughing and Tilling: Start by ploughing the field to a depth of 20-30 cm to loosen the soil, followed by tilling to break up any clods. This ensures that the seeds have loose, aerated soil for proper root penetration.
- Leveling the Field: After tilling, level the field to prevent water pooling, as chickpeas are susceptible to root rot in waterlogged conditions. A level seedbed also ensures uniform seed distribution.
- Fertilization: Chickpeas are leguminous crops and fix their own nitrogen through a symbiotic relationship with Rhizobium bacteria. However, it’s still important to apply phosphorus-based fertilizers at planting to support root development. A typical rate is 30-40 kg/ha of phosphorus.
2. Sowing Chickpeas
Planting Time: In South Africa, chickpeas are generally planted in late winter or early spring (July to September) depending on the region. The crop requires cool temperatures for germination but needs warmer conditions to mature.
- Seed Selection: Use high-quality, certified chickpea seeds that are disease-resistant and well-suited to local growing conditions. Popular varieties include Desi and Kabuli chickpeas. Ensure seeds are treated with Rhizobium inoculant to enhance nitrogen fixation.
- Sowing Depth and Spacing: Sow the seeds at a depth of 5-7 cm with a row spacing of 30-35 cm and 10-15 cm between plants within the row. This ensures adequate space for root development and air circulation, reducing the risk of fungal infections.
- Seed Rate: A general recommendation is to use 80-100 kg/ha of chickpea seeds, depending on the size of the seeds and the desired plant density.
3. Watering Requirements
Chickpeas are drought-tolerant but require well-timed watering during critical growth stages:
- Germination Stage: Chickpeas need adequate moisture during germination, but over-watering can lead to seed rot. Ensure the soil is moist but not waterlogged.
- Flowering and Pod Development: This is the most critical stage for watering. Insufficient water during flowering and pod development can lead to poor yields. Provide 1-2 moderate irrigations during this stage.
- Water Frequency: Chickpeas generally require 250-400 mm of water throughout the growing season. If growing in areas with low rainfall, use drip or sprinkler irrigation systems to maintain moisture levels. Watering frequency depends on soil type, but typically, irrigation should be spaced out every 10-15 days, with less frequent watering as the crop matures.
4. Fertilizer Application
Chickpeas are nitrogen-fixing plants, but phosphorus and potassium are still essential to maximize yields.
- Phosphorus: As mentioned earlier, apply a phosphorus-based fertilizer at planting, around 30-40 kg/ha.
- Potassium: If soil tests show a potassium deficiency, apply 30-40 kg/ha of potassium to improve the plant’s resistance to diseases and enhance water-use efficiency.
Avoid excessive nitrogen fertilizers, as they can suppress the plant’s ability to fix nitrogen naturally.
5. Pest and Disease Management
Chickpeas are susceptible to several pests and diseases, particularly during the growing season. Here’s how to manage them:
- Pests:
- Cutworms and aphids are common pests during the early stages. Cutworms can damage young seedlings by feeding on the stems, while aphids can transmit viral diseases.
- Pod borers become a problem during flowering and podding stages. They feed on the developing pods and seeds, leading to significant yield losses. Control Methods:
- Use organic or synthetic pesticides such as neem oil for aphids, and apply insecticides like chlorantraniliprole to control pod borers. Begin application when pest populations reach an economic threshold.
- Diseases:
- Ascochyta blight: A fungal disease that affects leaves, stems, and pods, especially under wet and humid conditions. Symptoms include lesions on the leaves and pods.
- Fusarium wilt: A soil-borne fungal disease that causes wilting and yellowing of the plant. It is particularly common in poorly drained soils.
- Root rot: Occurs when there is excessive moisture in the soil, leading to root decay. Control Methods:
- Practice crop rotation with non-legume crops to prevent the buildup of soil-borne diseases.
- Treat seeds with a fungicide before planting to reduce the risk of soil-borne diseases.
- Apply fungicides such as chlorothalonil or tebuconazole to control Ascochyta blight during wet weather.
6. Weed Control
Weeds compete with chickpeas for water, nutrients, and sunlight, especially during the early stages of growth.
- Pre-emergence herbicides: Apply pre-emergence herbicides like pendimethalin or imazethapyr after sowing to control weeds before they emerge.
- Post-emergence herbicides: In case of late weed emergence, use post-emergence herbicides such as clethodim (for grass weeds) or imazethapyr (for broadleaf weeds) once the chickpeas have established.
Hand weeding is also an option for small-scale farms, but for large-scale operations, mechanical weeding using a tractor-mounted cultivator may be required.
7. Harvesting Chickpeas
Chickpeas are typically ready for harvest 90-120 days after planting, depending on the variety and growing conditions.
- Signs of Maturity: The plants turn brown and dry, and the pods become hard and brittle. It’s important to harvest the crop once the moisture content is around 12-15%, as harvesting too early or too late can lead to yield losses.
- Harvesting Equipment: For large-scale operations, mechanical harvesters like combine harvesters are used to collect chickpeas. Small-scale farmers can harvest by hand, but this method is more labor-intensive.
8. Post-Harvest Handling and Storage
After harvest, chickpeas should be dried to a moisture content of around 9-10% to prevent fungal growth and insect infestation during storage.
- Drying: Spread the chickpeas in thin layers under the sun or use mechanical dryers. Ensure the drying process is thorough to avoid mold development.
- Storage: Store the chickpeas in cool, dry, and well-ventilated conditions. Use airtight containers or bags to protect the seeds from moisture and pests. Consider treating the stored chickpeas with a mild insecticide or organic pest control methods if long-term storage is necessary.
Growing chickpeas in South Africa offers farmers the opportunity to cultivate a drought-tolerant, nitrogen-fixing crop that can boost both soil fertility and farm profitability. By paying attention to each stage of the chickpea growth cycle — from seed selection and land preparation to pest control and harvest — farmers can maximize their yields and produce high-quality chickpeas for the local and export markets. With proper management of water, nutrients, pests, and diseases, chickpeas can thrive in various South African climates, ensuring a successful and sustainable farming operation.
Join 'Farmers Mag' WhatsApp Channel
Get the latest Farming news and tips delivered straight to your WhatsApp
CLICK HERE TO JOIN