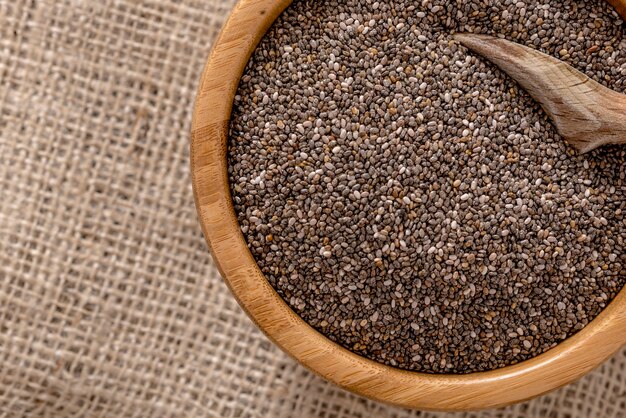
Chia seeds, valued for their high nutritional content and versatility, are becoming a popular crop worldwide. For South African farmers, chia represents a lucrative opportunity to tap into the growing health food market. Cultivating chia is not only beneficial for its rich omega-3 fatty acids, fiber, and antioxidants but also because it’s a relatively low-maintenance crop once established. This article outlines the detailed process of growing chia seeds, from land preparation to harvesting, storage, and pest management.
1. Land Preparation and Soil Requirements
Chia grows best in well-drained, loamy soils with good aeration. Avoid areas prone to waterlogging as this can damage the root system. The soil pH should ideally be between 6.0 and 8.0, as chia can tolerate slightly acidic to neutral soils. Before planting, conduct a soil test to assess the pH and nutrient content.
Land Preparation Steps:
- Clear the land of weeds, rocks, and debris.
- Plow the soil to a depth of 20–30 cm to improve aeration and drainage.
- Level the land to ensure even distribution of water.
- Incorporate organic matter, such as compost or well-rotted manure, into the soil to improve fertility and structure.
2. Sowing Chia Seeds
Chia is typically planted in the spring when temperatures range between 15°C and 25°C. It prefers warm conditions for optimal growth, making most parts of South Africa suitable for chia cultivation.
Sowing Method:
- Spacing: Chia seeds should be sown at a depth of about 0.5–1 cm in rows spaced 30–45 cm apart. Maintain a distance of 20–30 cm between plants to prevent overcrowding and ensure proper airflow.
- Seed rate: Use about 6–8 kg of seeds per hectare for good coverage.
- Planting time: The best planting time in South Africa is during early spring, after the last frost, as chia is sensitive to cold temperatures.
3. Watering and Irrigation
Chia is relatively drought-tolerant, but proper irrigation during key growth stages is essential for high yields.
- Germination: During the first two weeks after sowing, keep the soil moist but not waterlogged to ensure good germination.
- Vegetative Growth: Moderate watering is required during the vegetative stage. Chia plants need about 30–40 mm of water per week, depending on the climate and soil moisture retention.
- Flowering and Seed Formation: Chia plants are sensitive to overwatering at this stage. Irrigate sparingly to avoid root diseases and improve seed quality.
- Irrigation Systems: Drip irrigation is preferred for chia, as it minimizes water usage and prevents water from settling on the leaves, reducing the risk of fungal diseases.
4. Fertilizer Application
Although chia does not have high nutrient demands, applying the right fertilizer will enhance growth and yields.
- Before Planting: Incorporate 15–20 tons of compost or organic manure per hectare into the soil to improve fertility.
- Nitrogen (N): Apply 50–60 kg/ha of nitrogen to promote healthy vegetative growth.
- Phosphorus (P): A base application of 30–40 kg/ha of phosphorus helps in root development and flower formation.
- Potassium (K): Apply 40–50 kg/ha of potassium to enhance seed production and improve disease resistance.
- Topdressing: During the flowering stage, you can apply additional nitrogen to boost plant vigor.
5. Growth Stages of Chia
Chia plants go through several growth stages, each requiring careful management:
- Germination (7–14 days): The seeds will sprout within one to two weeks. Ensure consistent moisture at this stage.
- Vegetative Stage (4–6 weeks): Plants will develop their foliage. Thin out weaker plants to ensure adequate space and airflow.
- Flowering (8–10 weeks): Chia produces purple or white flowers that will eventually form seed pods. During this stage, avoid excessive water and monitor for pests.
- Seed Maturation (12–14 weeks): Seeds develop in the pods. Monitor for drying signs, as the plants will start to wither when seeds mature.
6. Pest and Disease Management
While chia is generally resistant to many pests and diseases, it’s still important to monitor for common issues:
- Fungal Diseases: Overwatering or high humidity can lead to fungal infections like powdery mildew. Avoid overhead irrigation and space plants adequately to allow airflow.
- Insects: Common insect pests include aphids, leafhoppers, and whiteflies. These can be controlled using organic insecticides or natural predators like ladybugs.
- Weed Control: Chia can be susceptible to weed competition, especially during the early growth stages. Use pre-emergent herbicides or mulch to suppress weeds. Manual weeding may also be necessary.
Pesticide and Herbicide Application:
- Pesticides: If pest infestations are detected, use neem oil or insecticidal soap as natural options. For larger infestations, pyrethrin-based products are effective. Apply these during early morning or late afternoon to avoid harming pollinators.
- Herbicides: If weeds become unmanageable, you can use post-emergent herbicides that target broadleaf weeds, but use them sparingly to avoid damaging the chia plants.
7. Harvesting Chia Seeds
Chia plants are ready for harvest when the flowers dry out and the seeds inside the pods become hard. Typically, chia is ready to harvest about 90–120 days after planting.
Harvesting Process:
- Visual cues: The plant will turn brown, and the seed pods will dry out.
- Manual Harvesting: For small farms, chia can be harvested manually by cutting the plants and allowing them to dry in the sun for a few days. Once dried, the seeds can be separated from the pods by threshing.
- Mechanical Harvesting: For larger farms, a combine harvester can be used to efficiently collect chia seeds, reducing labor costs and time.
8. Post-Harvest Processing and Storage
- Cleaning: After threshing, clean the seeds by winnowing or using mechanical seed cleaners to remove plant debris.
- Drying: Ensure the seeds are fully dried to a moisture content of 10–12% to prevent mold during storage. Sun-drying is effective, but mechanical dryers can be used for large quantities.
- Storage: Store chia seeds in a cool, dry place in airtight containers to protect them from moisture and pests. Under proper conditions, chia seeds can be stored for up to two years without losing their nutritional value.
Chia is an excellent crop choice for South African farmers looking to diversify their farming operations. With proper land preparation, attention to watering, pest management, and the right fertilizers, chia can thrive and provide a profitable yield. Though relatively low-maintenance, chia farming requires careful monitoring throughout its growth stages to ensure optimal results. By following the guidelines above, South African farmers can grow chia successfully, meeting the rising demand for this nutritious superfood.
Join 'Farmers Mag' WhatsApp Channel
Get the latest Farming news and tips delivered straight to your WhatsApp
CLICK HERE TO JOIN