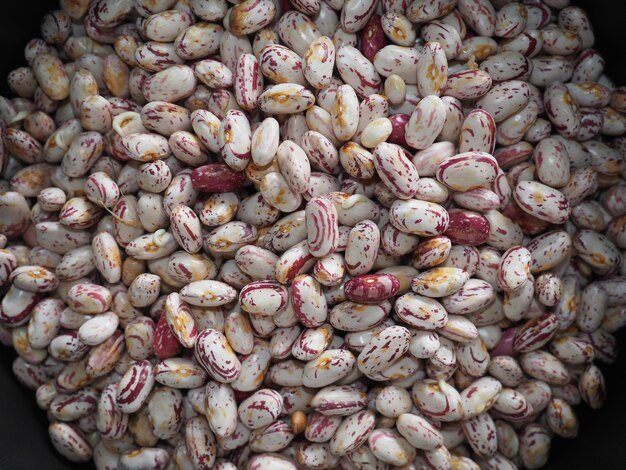
Pinto beans are a valuable crop for South African farmers, offering excellent nutritional benefits and a good market demand. They are relatively easy to grow but require careful attention to soil conditions, water, and disease management. This guide will walk you through the process of growing pinto beans from seed to harvest and storage, detailing inputs, machinery, pests, diseases, soil management, and the proper use of pesticides and herbicides.
1. Land Preparation and Soil Requirements
Soil Type
Pinto beans thrive in well-drained loamy or sandy loam soils with a pH between 6.0 and 7.0. Avoid planting in heavy clay soils, as poor drainage can lead to root rot. It is advisable to perform a soil test before planting to determine nutrient levels and pH adjustments, if necessary.
Land Preparation
Proper land preparation is critical to ensure good germination and plant growth. Here are the steps for effective land preparation:
- Plough the land to a depth of 20-30 cm to break up soil compaction and improve aeration.
- Harrow the field to create a fine seedbed. The seedbed should be free of clods and weeds for optimal germination.
- Apply agricultural lime if your soil pH is below 6.0 to neutralize acidity and improve nutrient availability.
2. Planting
Optimal Planting Time
Pinto beans are a warm-season crop and should be planted in spring when soil temperatures reach 16-18°C. In South Africa, the ideal planting time is between September and November, depending on the region.
Seed Rate and Spacing
Pinto beans require a seed rate of approximately 80-100 kg per hectare. The recommended spacing is:
- Rows: 40-60 cm apart.
- Plants: 7-10 cm apart within the row.
Planting Depth
Plant seeds at a depth of 2.5-4 cm, ensuring good seed-to-soil contact. Avoid planting too deep, as this could delay germination.
3. Watering and Irrigation
Water Requirements
Pinto beans require about 350-500 mm of water over the growing season. It is essential to ensure consistent watering, especially during the critical growth stages such as flowering and pod development.
Irrigation Frequency
- Germination and early growth: Water the field lightly 2-3 times per week to keep the soil moist but not waterlogged.
- Flowering and pod development: Increase the frequency to 3-4 times per week, ensuring the soil stays consistently moist.
- Maturity stage: Reduce watering as the plants approach maturity to allow the beans to dry naturally.
Drip irrigation is recommended for water efficiency, but overhead sprinklers can also be used.
4. Fertilization
Pinto beans, like most legumes, fix nitrogen through symbiotic relationships with Rhizobium bacteria. However, supplemental fertilization is often necessary to achieve high yields.
Fertilizer Application
- Nitrogen: Pinto beans generally do not require heavy nitrogen applications. However, a small starter application of around 20-30 kg/ha of nitrogen may help in the early growth stages.
- Phosphorus (P2O5): Apply 30-40 kg/ha of phosphorus to promote root development, especially in soils low in phosphorus.
- Potassium (K2O): Apply 20-30 kg/ha of potassium to support overall plant health and pod formation.
- Micronutrients: Ensure that your soil has adequate levels of zinc and boron, as deficiencies in these elements can affect plant growth.
Inoculating your seeds with Rhizobium bacteria before planting will improve nitrogen fixation and enhance the crop’s overall health.
5. Growth Stages and Crop Management
Germination (7-10 Days)
Pinto bean seeds germinate within 7-10 days, provided the soil temperature is adequate and moisture levels are consistent. During this stage, it is crucial to maintain even soil moisture to promote uniform germination.
Vegetative Stage (3-5 Weeks)
At this stage, the plant will grow leaves and roots rapidly. Weed control is critical to prevent competition for nutrients and water. Mechanical weeding or herbicide application can be done at this stage to keep the field clean.
Flowering (6-8 Weeks)
Pinto beans flower approximately 6-8 weeks after planting. This is the most critical stage in terms of water and nutrient needs. Any stress during this phase, such as water shortage or pest attacks, can significantly reduce yield.
Pod Formation and Filling (8-12 Weeks)
After flowering, the pods begin to form and fill with beans. Continue to water the plants adequately, but avoid waterlogging, as this can lead to root diseases.
Maturity and Harvest (12-16 Weeks)
Once the pods turn yellow and the beans inside are firm, it’s time to harvest. Typically, pinto beans are ready for harvest 90-120 days after planting, depending on the variety and growing conditions.
6. Pest and Disease Management
Pests
- Aphids: Aphids can cause damage to pinto beans by feeding on plant sap and spreading diseases like Bean Common Mosaic Virus (BCMV). Use insecticides like pyrethroids or natural remedies such as neem oil to control aphid populations.
- Cutworms: These pests attack seedlings, cutting them at ground level. Control cutworms using chlorpyrifos or other approved insecticides.
- Bean Weevil: This pest can cause damage to both the plants and stored beans. Use organophosphates to manage bean weevils.
Diseases
- Anthracnose: A fungal disease causing dark lesions on the leaves, stems, and pods. Control with fungicides such as Chlorothalonil or Copper oxychloride.
- Root Rot: Caused by soil-borne pathogens, particularly in waterlogged soils. Avoid excessive irrigation and plant in well-drained soils to prevent root rot.
- Bean Rust: Causes orange-brown pustules on leaves. Use systemic fungicides and plant resistant varieties.
Weed Control
Weeds compete with pinto beans for nutrients, water, and light. Use pre-emergence herbicides like Pendimethalin or post-emergence herbicides to control weeds effectively. Mechanical weeding can also be done early in the growing season.
7. Harvesting
Pinto beans are ready to harvest once the pods are fully matured and dried. This typically occurs when the leaves start to yellow and fall off, and the beans inside the pods are firm.
Harvesting Methods
- Manual Harvesting: In small-scale farming, beans can be harvested by hand, pulling up the plants when 80-90% of the pods are dry.
- Mechanical Harvesting: For large-scale operations, a combine harvester can be used to collect the beans efficiently.
8. Post-Harvest Handling and Storage
Drying
After harvesting, beans need to be dried to a moisture content of 12-14% to prevent spoilage. Spread the beans in a well-ventilated area or use mechanical dryers to achieve proper drying.
Threshing
Once the beans are fully dry, threshing is necessary to separate the beans from the pods. This can be done manually for small farms or with mechanical threshers on larger operations.
Storage
Store pinto beans in cool, dry conditions to prevent fungal growth and insect infestations. Use airtight containers or bags to maintain the quality of the beans. Beans should be regularly checked for pests during storage, especially for bean weevils. For longer storage, beans can be treated with an approved pesticide or stored under low-temperature conditions to minimize pest activity.
Growing pinto beans in South Africa can be a profitable venture if managed correctly. By paying attention to the specific requirements of soil preparation, planting, irrigation, fertilization, and pest management, farmers can ensure healthy crops and high yields. Careful monitoring of the crop’s growth stages and taking timely action against weeds, pests, and diseases will guarantee a successful harvest, leading to a rewarding season. Whether you are a small-scale farmer or working on a commercial farm, this guide provides a solid foundation for growing pinto beans from seed to storage.
Join 'Farmers Mag' WhatsApp Channel
Get the latest Farming news and tips delivered straight to your WhatsApp
CLICK HERE TO JOIN


