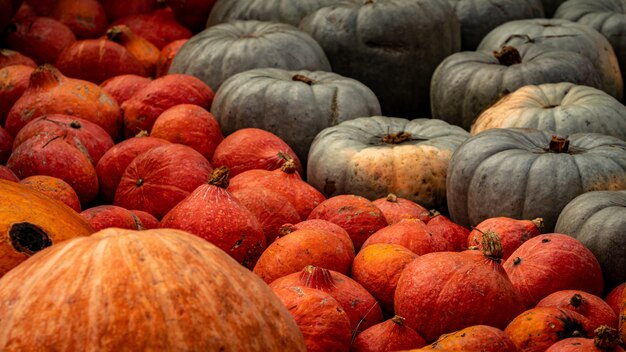
Squash is a versatile and nutritious crop that thrives in various climates, making it a popular choice among South African farmers. Growing squash requires careful planning, attention to detail, and an understanding of the growth stages from seed to harvest. This guide will cover the entire process, including land preparation, growth stages, pest and disease management, fertilizer application, and post-harvest storage.
1. Land Preparation
Before planting squash, proper land preparation is essential.
- Soil Type: Squash prefers well-drained, loamy soils rich in organic matter. Sandy soils can be beneficial for drainage, while clay soils may require amendments to improve aeration and drainage.
- Soil Testing: Conduct soil tests to determine nutrient levels and pH. Ideal soil pH for squash is between 6.0 and 6.8.
- Tillage: Prepare the land by tilling to a depth of 15-20 cm to break up compacted soil and incorporate organic matter. This can be done using a tractor with a plough or disc harrow.
- Weed Control: Remove existing weeds through tillage or herbicides before planting to reduce competition for nutrients and water.
2. Choosing Seeds and Planting
- Seed Selection: Choose disease-resistant varieties suitable for your climate, such as butternut squash, zucchini, or spaghetti squash.
- Planting Time: In South Africa, the best planting time is during the warm months, usually from late spring to early summer (September to December).
- Planting Method: Squash can be direct-seeded or transplanted. If direct-seeding, plant seeds 2-3 cm deep in rows spaced about 1-1.5 meters apart. Transplants should be started indoors 4-6 weeks before the last frost date.
- Spacing: Space seeds or seedlings 30-60 cm apart, depending on the variety, to allow for adequate growth and airflow.
3. Growth Stages
Squash goes through several growth stages, each requiring specific care:
- Germination (1-2 weeks): After planting, seeds will germinate in 7-14 days, depending on soil temperature (optimal is around 20-25°C). Ensure soil moisture is consistent, and avoid over-watering.
- Seedling Stage (2-4 weeks): As seedlings emerge, thin them to the recommended spacing to reduce competition. Monitor for pests such as aphids or cutworms.
- Vegetative Stage (4-8 weeks): During this stage, the plant will focus on leaf and vine growth. Fertilize with a balanced fertilizer (N-P-K 10-10-10) at planting and again after 4 weeks. Water regularly, ensuring the soil remains moist but not waterlogged.
- Flowering and Fruit Development (8-16 weeks): Squash plants produce male flowers first, followed by female flowers. Pollination is crucial; if necessary, assist with hand pollination using a small brush. Continue watering regularly, aiming for about 25-30 mm of water per week.
- Maturation and Harvest (16-20 weeks): Squash is typically ready for harvest when it reaches its full size and color. For summer squash, harvest when the skin is still tender. For winter squash, wait until the skin hardens. Use a sharp knife or pruning shears to cut the fruit from the vine.
4. Water Requirements
- Frequency: Squash requires consistent moisture, particularly during flowering and fruit set. Water deeply at least once a week, adjusting based on rainfall and soil moisture levels.
- Irrigation: Consider drip irrigation for efficient water use, reducing evaporation and minimizing weed growth.
5. Fertilization
- Types of Fertilizers: Use balanced fertilizers for initial planting and a higher phosphorus (P) fertilizer (like 5-10-10) during flowering to promote fruit set. Organic options include compost or well-rotted manure.
- Application Timing: Apply fertilizers at planting and side-dress again during the vegetative and flowering stages based on soil tests.
6. Pest and Disease Management
Common pests and diseases to watch for include:
- Pests:
- Squash Bugs: Monitor for yellowing leaves and wilting. Use insecticidal soap or neem oil if infestations occur.
- Aphids: Check for clusters on leaves. Use insecticidal soap or introduce beneficial insects like ladybugs.
- Diseases:
- Powdery Mildew: This fungal disease appears as white spots on leaves. Ensure proper spacing for air circulation and apply fungicides if severe.
- Downy Mildew: Look for yellow leaves with gray spores. Use resistant varieties and fungicides as needed.
- Herbicides: If weeds become problematic, use pre-emergent herbicides before planting or post-emergent herbicides targeting specific weeds, following label instructions.
7. Harvesting and Storage
- Harvesting: Use a sharp knife to cut squash from the vine, leaving a 2-3 cm stem attached to prevent rot.
- Post-Harvest Handling: Handle squash gently to avoid bruising. Clean and dry them before storage.
- Storage Conditions: Store squash in a cool, dark, and dry place, ideally at temperatures between 10-15°C with good ventilation. Properly stored squash can last several months, particularly winter varieties.
Growing squash from seed to harvest in South Africa requires careful planning and management at each stage. By following these guidelines on land preparation, planting, watering, fertilization, pest and disease management, and post-harvest storage, farmers can optimize their squash production, ensuring a successful and profitable crop. With attention to detail and proactive management, squash can be a valuable addition to any farming operation.


