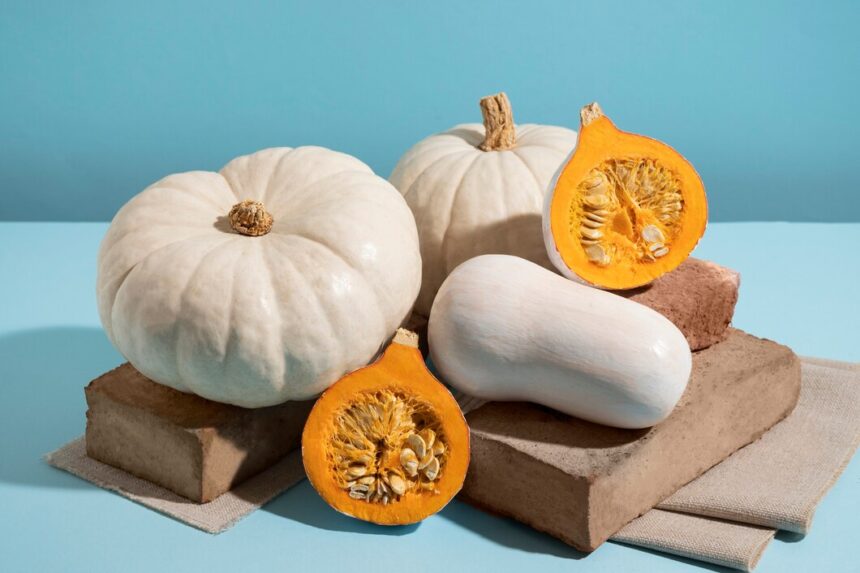
Pumpkins are a versatile and rewarding crop for South African farmers, offering both nutritional benefits and economic value. Whether you’re growing for personal consumption or commercial sale, understanding the process from seed to harvest is essential. This guide covers everything from land preparation and planting to pest management and storage.
1. Land Preparation
Before planting, proper land preparation is crucial for successful pumpkin growth.
- Soil Type: Pumpkins thrive in well-drained, loamy soils with good organic matter content. Ideally, pH levels should be between 6.0 and 6.8.
- Tillage: Use machinery such as a plough and harrow to break up the soil, incorporate organic matter, and create a fine seedbed. A rotary tiller can also be beneficial for finer soil preparation.
- Soil Testing: Conduct soil tests to determine nutrient levels and pH. Amend the soil based on test results with lime to adjust pH or organic matter to improve fertility.
2. Fertilizers
Pumpkins require adequate nutrients for healthy growth.
- Base Fertilization: Apply a balanced fertilizer before planting. A general recommendation is 5-10-10 (N-P-K) to support root development and overall growth. Organic options like compost or well-rotted manure can also be used.
- Side Dressing: Once seedlings are established, apply additional nitrogen fertilizer (e.g., urea or ammonium nitrate) to promote leaf and vine growth. Side-dress every 3-4 weeks based on growth and soil tests.
3. Planting
Once your land is prepared and nutrients are in place, you can start planting.
- Timing: In South Africa, the best time to plant pumpkins is during the warm months (September to November). The soil temperature should be at least 15°C for optimal germination.
- Seed Depth: Plant seeds about 2-4 cm deep in rows spaced 1.5-2 meters apart. Plant 2-3 seeds per hill, thinning to the strongest seedling later.
- Irrigation: Ensure consistent moisture during germination, which typically takes 7-10 days.
4. Growth Stages
Understanding the growth stages of pumpkins helps you manage inputs effectively.
- Germination (Days 1-7): Keep the soil consistently moist but not waterlogged. Monitor for weeds that compete for resources.
- Vegetative Growth (Weeks 2-6): During this phase, focus on irrigation (2-3 times per week) and applying fertilizers. At this stage, plants will develop leaves and vines.
- Flowering (Weeks 7-10): Male flowers appear first, followed by female flowers. Pollination is crucial for fruit development; encourage pollinators by planting flowering crops nearby.
- Fruit Development (Weeks 11-14): Once pollination occurs, pumpkins begin to form. Monitor for adequate water, and reduce nitrogen fertilizer to promote fruit maturation.
- Maturation (Weeks 15-20): Pumpkins are ready for harvest when they reach full size, color, and a hard skin. Conduct a “thump test” — a hollow sound indicates ripeness.
5. Watering Requirements
Pumpkins need consistent moisture, particularly during flowering and fruit development.
- Frequency: Water the plants deeply once or twice a week, depending on rainfall. Use drip irrigation to conserve water and minimize disease risk.
- Amount: Aim for about 2.5 cm of water per week, adjusting for rainfall and soil moisture.
6. Pest and Disease Management
Several pests and diseases can affect pumpkin crops.
- Common Pests:
- Aphids: Monitor for infestations; use insecticidal soap or neem oil if necessary.
- Squash Bugs: Handpick and destroy; consider using insecticides if populations are high.
- Cucumber Beetles: Use row covers to prevent access to plants, applying insecticides when populations surge.
- Diseases to Watch:
- Powdery Mildew: A fungal disease that appears as white powdery spots. Apply fungicides at the first sign of symptoms.
- Downy Mildew: Similar to powdery mildew but causes yellow spots on leaves. Use resistant varieties and fungicides for control.
- Root Rot: Caused by overwatering or poorly drained soils. Ensure proper drainage and avoid overwatering.
7. Harvesting
Pumpkins are usually ready for harvest in late summer to early autumn, depending on the variety.
- Indicators of Maturity: Look for a hard rind, a change in color, and dried stems. The leaves will also begin to wilt.
- Harvesting Method: Use sharp knives or shears to cut pumpkins from the vine, leaving a few inches of stem attached. Handle carefully to avoid bruising.
8. Storage
Proper storage can extend the shelf life of your pumpkins.
- Curing: After harvesting, cure pumpkins in a warm, dry place for 10-14 days to harden the skin and enhance flavor.
- Storage Conditions: Store pumpkins in a cool, dry, and dark area (ideally around 10-15°C) with good air circulation. Avoid stacking to prevent bruising.
Growing pumpkins in South Africa can be a rewarding venture, provided farmers understand the complete process from seed to harvest. By focusing on land preparation, soil health, pest management, and proper storage, you can ensure a successful pumpkin crop that meets both personal and commercial needs. With careful planning and attention to detail, your pumpkin farming endeavors can yield abundant rewards.

