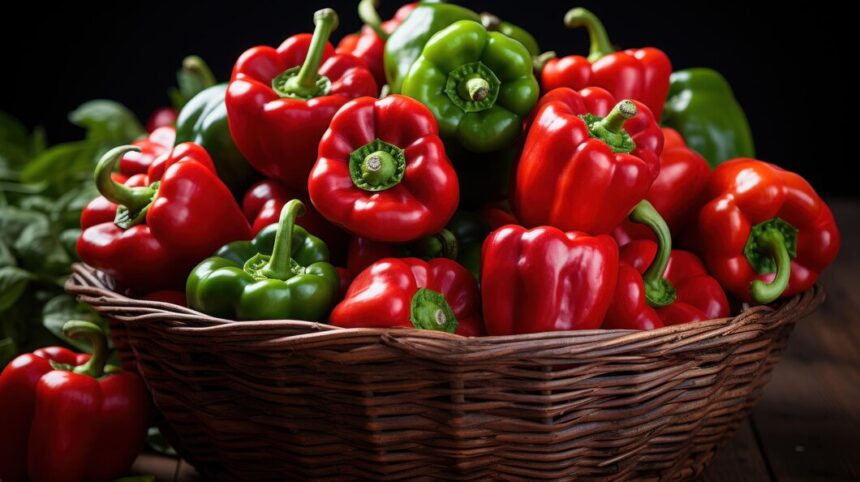
Growing peppers can be a rewarding endeavor for South African farmers, given their popularity in local cuisine and the potential for export. Understanding the complete process from seed to harvest, including proper land preparation, soil types, fertilization, watering, and pest management, is crucial for maximizing yield and quality. Here’s a detailed guide to successfully cultivate peppers.
1. Land Preparation
Soil Type and Quality
Peppers thrive in well-drained, fertile soils with a pH of 6.0 to 6.8. Sandy loam soils are ideal, as they provide good drainage while retaining enough moisture and nutrients. Before planting, conduct a soil test to determine nutrient levels and pH.
Land Preparation Steps
- Tillage: Plow the field to a depth of 15-20 cm to loosen the soil. This helps with root penetration and allows for better moisture retention.
- Leveling: Level the soil to ensure uniform water distribution and reduce the risk of waterlogging.
- Incorporating Organic Matter: Add well-rotted manure or compost to improve soil fertility and structure. Aim for at least 2-5 tons per hectare.
2. Seed Selection and Sowing
Choosing the Right Varieties
Select pepper varieties that are well-suited for your region. Common varieties include bell peppers, jalapeños, and chili peppers. Consider factors like market demand and disease resistance when selecting seeds.
Sowing Seeds
- Seedlings: Start seeds in seed trays or plug trays about 8-10 weeks before the last frost date.
- Soil Mix: Use a sterile seedling mix that retains moisture while providing good drainage.
- Sowing Depth: Sow seeds about 0.5 cm deep and cover lightly with soil.
- Temperature: Maintain soil temperatures of 20-30°C for optimal germination.
3. Seedling Care
Watering
- Frequency: Keep the soil consistently moist but not waterlogged. Water seedlings every 2-3 days, adjusting based on humidity and temperature.
- Irrigation Method: Use a gentle watering method to avoid disturbing the seeds. A misting system can be beneficial for seedlings.
Fertilization
- Initial Fertilization: Apply a balanced fertilizer (e.g., 10-10-10 NPK) at half-strength after seedlings develop their first true leaves.
- Transplanting: Prior to transplanting, harden off seedlings by gradually exposing them to outdoor conditions for a week.
4. Transplanting
Timing
Transplant seedlings when they are about 15-20 cm tall and after the danger of frost has passed, usually 2-3 weeks after the last frost.
Transplanting Process
- Spacing: Space plants 30-45 cm apart in rows that are 75-90 cm apart, depending on the variety.
- Watering: Water thoroughly after transplanting to help seedlings establish.
5. Growth Stages
Vegetative Stage (3-6 weeks after transplanting)
- Watering: Ensure consistent moisture, watering 2-3 times a week, especially during dry spells.
- Fertilization: Side-dress with nitrogen-rich fertilizer (e.g., 23-0-0) at this stage to promote lush foliage.
Flowering Stage (6-8 weeks after transplanting)
- Watering: Continue regular watering; however, reduce nitrogen and switch to a phosphorus-rich fertilizer (e.g., 10-20-20) to support blooming.
- Pest Management: Monitor for aphids and spider mites, which can affect flower development. Use insecticidal soap if needed.
Fruit Development Stage (8-12 weeks after transplanting)
- Watering: Increase watering to support fruit development, ensuring consistent moisture.
- Fertilization: Apply a balanced fertilizer every 4-6 weeks.
- Pest Management: Watch for thrips and whiteflies. Apply pesticides judiciously, adhering to the recommended application rates and timing.
6. Harvesting
Timing
Harvest peppers when they reach full size and color. For bell peppers, this is usually 70-90 days after transplanting. For hot peppers, harvesting may occur later based on desired ripeness.
Harvesting Techniques
- Use sharp, sanitized pruning shears to avoid damaging the plant.
- Harvest in the morning when temperatures are cooler for better quality.
- Handle peppers gently to prevent bruising.
7. Post-Harvest Handling and Storage
Cleaning
- Remove debris and wash peppers with clean water to prevent mold and bacterial growth.
Storage Conditions
- Store peppers at 7-10°C with high humidity (90-95%) to extend shelf life. Proper ventilation is essential to avoid moisture buildup.
Shelf Life
Freshly harvested peppers can last 1-2 weeks in optimal storage conditions.
8. Pest and Disease Management
Common Pests
- Aphids: Small green insects that can weaken plants. Use insecticidal soap or neem oil.
- Spider Mites: Tiny pests causing stippling on leaves. Regular spraying of water can deter them.
- Whiteflies: Sticky residue and yellowing leaves indicate whitefly presence. Use yellow sticky traps and appropriate insecticides.
Common Diseases
- Powdery Mildew: White fungal growth on leaves. Improve air circulation and apply fungicides as needed.
- Bacterial Spot: Dark, water-soaked lesions on leaves. Remove infected plants and avoid overhead watering.
- Fusarium Wilt: A soil-borne disease causing yellowing and wilting. Rotate crops and use resistant varieties.
9. Fertilization Strategy
- Soil Test: Conduct soil tests regularly to tailor fertilizer applications.
- Types of Fertilizers: Use organic fertilizers (e.g., compost, manure) alongside chemical fertilizers for balanced nutrition.
- Application Timing: Fertilize at planting and during key growth stages (vegetative, flowering, and fruiting).
Growing peppers from seed to harvest requires careful planning, attention to detail, and effective management practices. By following these guidelines, South African farmers can cultivate healthy, productive pepper plants that thrive in local conditions. Staying vigilant against pests and diseases, managing water and nutrient inputs, and optimizing harvest and storage will ensure a successful pepper production journey.
Join 'Farmers Mag' WhatsApp Channel
Get the latest Farming news and tips delivered straight to your WhatsApp
CLICK HERE TO JOIN