Honeydew melons are a popular crop in South Africa, known for their sweet, juicy flesh and refreshing taste. Successfully growing honeydew melons requires careful attention to detail throughout the entire process, from land preparation to harvest and storage. Here’s a comprehensive guide for South African farmers on growing honeydew melons, including inputs, machinery, pest management, and more.
1. Land Preparation
Land preparation is crucial for creating an optimal growing environment. Here’s what you need to do:
- Site Selection: Choose a well-drained location with full sun exposure. Honeydew melons thrive in warm temperatures and do best in areas with good airflow.
- Soil Type: Honeydew melons prefer sandy loam to loamy soils that are rich in organic matter. Soil pH should be between 6.0 and 6.8.
- Tillage: Use a tractor with a plow to break up the soil, followed by a harrow to create a fine seedbed. This improves soil aeration and helps control weeds.
- Soil Testing: Conduct a soil test to determine nutrient levels and pH. This will inform your fertilization strategy.
2. Sowing Seeds
Once the land is prepared, it’s time to sow seeds.
- Seed Selection: Choose high-quality seeds from reputable suppliers. Look for varieties that are disease-resistant and suited to your local climate.
- Planting Time: In South Africa, honeydew melons are typically planted in late spring to early summer (September to November), when soil temperatures are consistently above 15°C (59°F).
- Sowing Method: Seeds can be sown directly into the field or started in seed trays. If sowing directly, plant seeds 2.5 cm deep in rows spaced 1.2 to 1.5 meters apart. Thin seedlings to one per hill after they develop two true leaves.
- Irrigation: Water the seeds lightly after planting to aid germination. A drip irrigation system is ideal for consistent moisture.
3. Germination and Seedling Stage
After planting, the seeds will germinate and develop into seedlings.
- Duration: Germination typically takes 5 to 10 days.
- Watering: Maintain soil moisture but avoid overwatering, which can lead to root rot.
- Weed Control: Use mulch to suppress weeds or apply a pre-emergent herbicide after sowing. Monitor for weeds and remove them manually if necessary.
4. Vegetative Growth Stage
During this phase, the plants will grow leaves and vines.
- Fertilization: Apply a balanced fertilizer (e.g., NPK 10-10-10) at planting and again when plants are 2 to 3 weeks old. This supports healthy vegetative growth.
- Water Requirements: Honeydew melons require about 25-30 mm of water per week, especially during dry spells. Ensure the soil remains consistently moist, particularly during flowering and fruit set.
- Pest Management: Monitor for aphids, cucumber beetles, and spider mites. Introduce beneficial insects, such as ladybugs, or use insecticidal soap as a low-toxicity option.
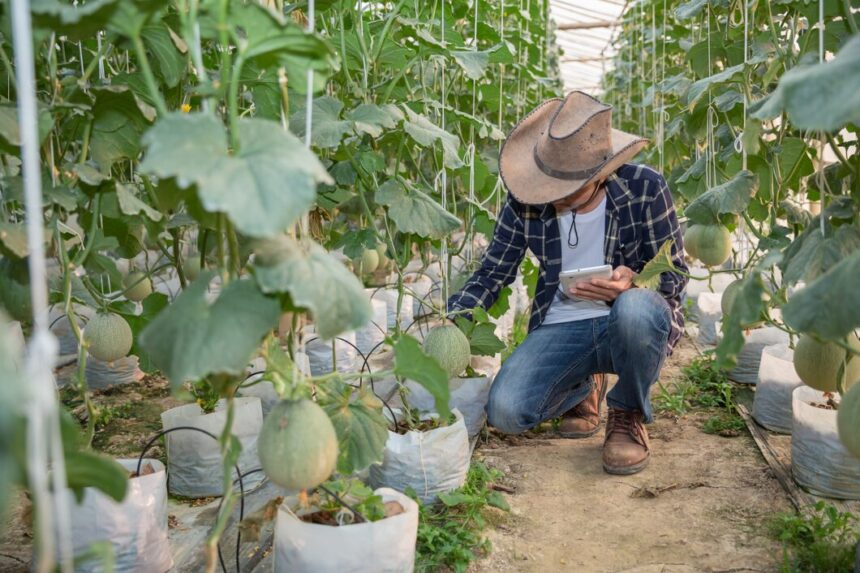
5. Flowering and Fruit Development Stage
As the plants mature, they will produce flowers and develop fruit.
- Pollination: Honeydew melons are typically pollinated by bees. Consider planting flowering plants nearby to attract pollinators.
- Fruit Thinning: Once the fruit sets, thin them to 1-2 fruits per vine to ensure better growth and quality.
- Pest and Disease Monitoring: Keep an eye out for powdery mildew, downy mildew, and fruit rot. Use fungicides as needed, following recommended application rates.
6. Maturation and Harvesting
The time from planting to harvest is approximately 70-90 days.
- Harvesting Indicators: Honeydew melons are ready for harvest when they turn a creamy yellow color and the stem begins to dry. The fruit should feel heavy for its size.
- Harvesting Technique: Use a sharp knife to cut the fruit from the vine, leaving a short stem attached to prevent damage.
7. Post-Harvest Handling and Storage
Proper handling and storage are vital for maintaining fruit quality.
- Cleaning: Remove any dirt or debris from the melons gently to avoid bruising.
- Storage Conditions: Store honeydew melons in a cool, dry place with temperatures between 7-10°C (45-50°F) and high humidity (90-95%).
- Shelf Life: Honeydew melons can last up to 2-3 weeks when stored properly.
8. Fertilizers and Soil Management
To maximize yield and quality, focus on appropriate fertilization and soil health.
- Fertilizer Types: Use organic matter (e.g., compost) and balanced fertilizers. Additionally, consider adding calcium and magnesium to promote healthy fruit development.
- Soil Health: Implement crop rotation and cover cropping to improve soil structure and nutrient content. Regularly test the soil and amend it as necessary.
9. Water Management
Effective water management is critical for the success of honeydew melons.
- Irrigation Frequency: Water the melons deeply but infrequently to encourage deep root growth. Adjust irrigation frequency based on rainfall and soil moisture.
- Water Quality: Ensure that the water used for irrigation is clean and free from contaminants.
10. Pest and Disease Management
Monitoring and managing pests and diseases is essential throughout the growth cycle.
- Common Diseases: Watch for powdery mildew, downy mildew, and bacterial wilt. Implement crop rotation and maintain good airflow around plants to reduce disease risk.
- Pesticide and Herbicide Use: Use pesticides as a last resort and follow local regulations. Always apply at the recommended rates and timings to avoid harming beneficial insects.
Growing honeydew melons can be a rewarding venture for South African farmers when approached with proper knowledge and practices. By following this comprehensive guide, from land preparation to post-harvest handling, farmers can optimize their production, minimize losses, and enhance their overall success in the market. With the right inputs, careful management, and a proactive approach to pest and disease control, honeydew melons can be a profitable crop that contributes to sustainable farming practices in South Africa.