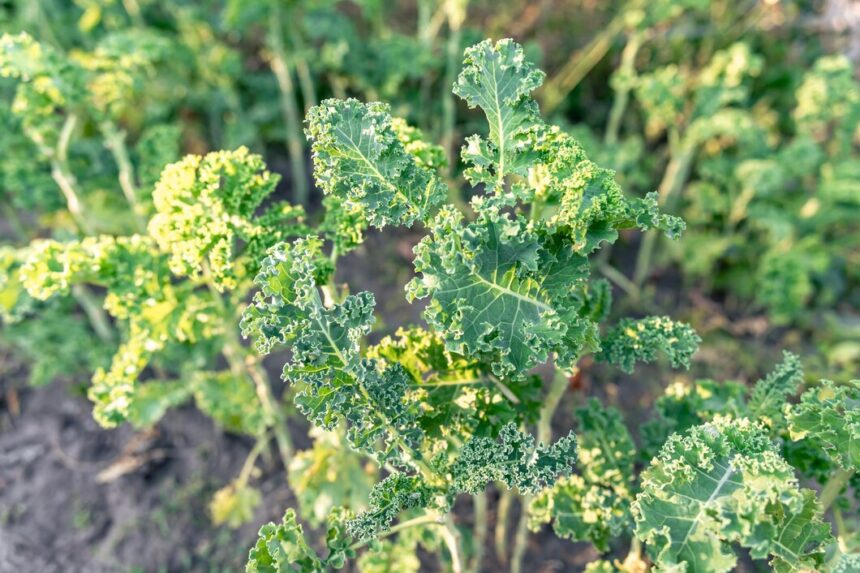
Kale (Brassica oleracea var. sabellica) is a nutrient-rich leafy green vegetable that has gained popularity among consumers for its health benefits. It is well-suited to South Africa’s climate, making it a profitable crop for local farmers. This guide provides detailed information on growing kale from seed to harvest, including land preparation, inputs required, pest and disease management, and post-harvest storage.
1. Land Preparation
Proper land preparation is crucial for successful kale cultivation.
- Site Selection: Choose a site with full sun exposure (at least 6-8 hours of sunlight daily) and well-drained soil.
- Soil Testing: Conduct a soil test to determine pH and nutrient levels. Kale thrives in slightly acidic to neutral soil (pH 6.0-7.5).
- Tillage: Use a plow or rotary tiller to prepare the soil. Turn the soil to a depth of at least 15-20 cm to break up compaction and improve aeration.
- Soil Amendments: Based on soil test results, incorporate organic matter (such as compost or well-rotted manure) and balanced fertilizers to improve fertility. Aim for a nitrogen-rich fertilizer, as kale requires significant nitrogen for healthy leaf growth.
2. Choosing Seeds
Select high-quality kale seeds suitable for your climate. Popular varieties include:
- Winterbor: A hardy variety with curly leaves, resistant to frost.
- Dwarf Blue Curled: Known for its compact growth and rich flavor.
- Lacinato (Dinosaur Kale): Recognized for its dark, wrinkled leaves and sweet taste.
3. Sowing Seeds
- Timing: Sow seeds in spring or late summer, as kale thrives in cooler temperatures. Ideal planting times in South Africa are from March to April and August to September.
- Seed Depth: Plant seeds 1-2 cm deep in rows spaced 30-45 cm apart. If starting indoors, transplant seedlings outdoors when they are 4-6 weeks old.
- Spacing: Thin seedlings to 30-45 cm apart once they have developed their first true leaves to allow for adequate growth and airflow.
4. Watering Requirements
Kale requires consistent moisture, particularly during germination and growth stages.
- Watering Schedule: Water regularly, providing about 2.5 cm (1 inch) of water per week, either through rainfall or irrigation. In hot, dry conditions, increase watering frequency.
- Irrigation Systems: Consider using drip irrigation to deliver water directly to the root zone, minimizing water waste and reducing the risk of foliar diseases.
5. Fertilization
Kale is a heavy feeder and requires adequate nutrients throughout its growth stages.
- Pre-plant Fertilization: Incorporate a balanced fertilizer (N-P-K ratio such as 10-10-10 or 5-10-10) during land preparation.
- Side Dressing: Apply nitrogen-rich fertilizers (such as urea or ammonium nitrate) when the plants are about 4-6 weeks old and again at mid-growth, ensuring proper leaf development.
6. Growth Stages
Kale goes through several key growth stages, each requiring specific care:
- Germination (1-2 weeks): Seeds will sprout in 5-10 days, depending on soil temperature (optimal at 15-20°C). Ensure consistent moisture during this stage.
- Seedling (2-4 weeks): After germination, seedlings will develop true leaves. Monitor for pests like aphids and caterpillars.
- Vegetative (4-10 weeks): Kale will grow rapidly. Maintain adequate water and nutrients during this stage.
- Maturity (10-16 weeks): Kale is ready for harvest when leaves are fully developed, typically within 8-12 weeks after sowing.
7. Pest and Disease Management
Kale is susceptible to various pests and diseases. Early identification and management are key to maintaining healthy plants.
- Common Pests:
- Aphids: Small, soft-bodied insects that suck sap from leaves. Use insecticidal soap or neem oil to manage infestations.
- Cabbage Worms: Green caterpillars that chew on leaves. Handpick or apply Bacillus thuringiensis (Bt) for control.
- Fleabeetles: Small beetles that create holes in leaves. Row covers can help prevent infestations.
- Diseases:
- Downy Mildew: A fungal disease causing yellow spots on leaves. Improve air circulation and apply fungicides if necessary.
- Black Rot: A bacterial disease causing yellowing and wilting. Practice crop rotation and remove infected plants to reduce spread.
8. When to Use Pesticides or Herbicides
- Herbicides: Use pre-emergent herbicides before planting to control weeds. Always follow label instructions and apply at the recommended rates.
- Pesticides: Apply pesticides only when pest populations exceed threshold levels. Use organic options where possible and follow local regulations on pesticide use.
9. Harvesting Kale
Kale is typically ready for harvest 60-90 days after planting, depending on the variety.
- Cutting Leaves: Harvest outer leaves first, leaving the central bud intact for continued growth. Use a sharp knife or scissors to avoid damaging the plant.
- Timing: For the best flavor, harvest in the morning when the leaves are crisp and full of moisture.
10. Post-Harvest Storage
Proper storage extends the shelf life of harvested kale.
- Cooling: Cool harvested kale quickly to maintain freshness. Consider using a cold room or ice water bath.
- Storage Conditions: Store kale in perforated plastic bags in the refrigerator. Ideal storage conditions are at temperatures of 0-4°C with high humidity.
- Shelf Life: Kale can typically be stored for up to a week under proper conditions. For longer storage, consider blanching and freezing.
Growing kale can be a rewarding endeavor for South African farmers, offering a nutritious crop with various culinary applications. By following the outlined steps for seed selection, land preparation, watering, fertilization, pest management, harvesting, and storage, farmers can optimize their kale production for maximum yield and quality. Emphasizing sustainable practices and ongoing education will help ensure the long-term success of kale cultivation in South Africa.
Join 'Farmers Mag' WhatsApp Channel
Get the latest Farming news and tips delivered straight to your WhatsApp
CLICK HERE TO JOIN