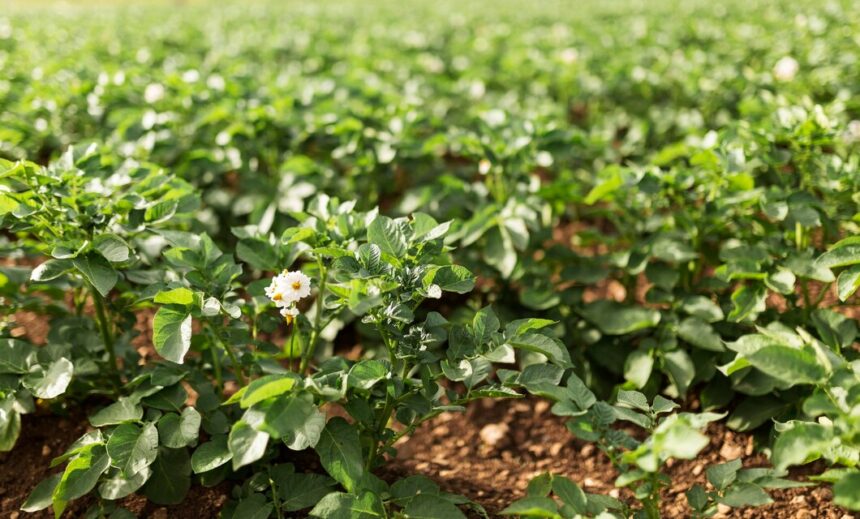
Potatoes are a staple crop in South Africa, valued for their versatility and nutritional benefits. Successful potato farming involves careful management from planting to harvest, ensuring optimal yield and quality. Here’s a detailed guide covering each stage of potato growth, including inputs, machinery, and management practices.
1. Land Preparation
a. Site Selection:
Choose a well-drained, loamy soil with good organic matter content. Avoid areas with heavy clay or waterlogged conditions, which can lead to poor tuber development and increased risk of diseases.
b. Soil Preparation:
Clear the land of weeds and debris. Plow or till the soil to a depth of 20-30 cm to ensure good aeration and root development. Incorporate organic matter such as compost or well-rotted manure to improve soil fertility and structure.
c. Soil Testing:
Conduct a soil test to determine nutrient levels and pH. Potatoes prefer a slightly acidic soil with a pH of 5.5 to 6.5. Adjust soil pH and fertility based on test results, using lime to raise pH or sulfur to lower it, if necessary.
2. Planting
a. Seed Selection:
Choose high-quality certified seed potatoes. Avoid using tubers from previous harvests, as they may carry diseases. Select varieties suited to local conditions and market preferences.
b. Cutting and Preparation:
Cut seed potatoes into pieces, ensuring each piece has at least one eye. Allow the cut pieces to dry for 24-48 hours before planting to reduce the risk of rot.
c. Planting:
Plant seed potatoes in rows spaced 75-90 cm apart, with tuber pieces 30-40 cm apart within the row. Plant at a depth of 10-15 cm. Ensure the soil temperature is between 7°C and 10°C for optimal sprouting.
d. Machinery and Tools:
Use a tractor with a potato planter or hand tools for planting, depending on the scale of your operation. Planters can speed up the process and ensure uniform planting depth and spacing.
3. Growth Stages
a. Emergence:
Potato plants typically emerge 2-3 weeks after planting. Ensure the soil remains consistently moist but not waterlogged. Mulching can help retain soil moisture and suppress weeds.
b. Vegetative Growth:
During this stage, plants develop stems and leaves. Fertilize with a balanced fertilizer or one high in phosphorus and potassium to support strong growth. Apply 200-250 kg/ha of 10-20-10 or a similar formulation, based on soil test recommendations.
c. Flowering:
Potatoes produce flowers 6-10 weeks after planting. This stage is crucial for tuber formation. Maintain consistent watering and fertilization.
d. Tuber Formation:
Tuber growth begins shortly after flowering. Ensure plants receive adequate water, approximately 25-30 mm per week, especially during tuber bulking. Avoid water stress, which can lead to small or misshapen tubers.
4. Pest and Disease Management
a. Common Pests:
- Potato Tuber Moth: Monitor for larvae in tubers. Use insecticides like lambda-cyhalothrin if infestations are severe.
- Aphids: These can spread viruses and reduce yields. Use systemic insecticides or natural predators for control.
b. Diseases:
- Late Blight: Caused by Phytophthora infestans, this disease can devastate crops. Apply fungicides such as copper-based products or systemic fungicides like metalaxyl as a preventive measure.
- Early Blight: Caused by Alternaria solani, it causes leaf spots and can be managed with fungicides and by avoiding overhead irrigation to reduce humidity.
c. Herbicides:
Control weeds using pre-emergence herbicides like metribuzin or post-emergence herbicides such as halosulfuron. Always follow label instructions and apply at recommended stages to avoid damage to the crop.
5. Harvesting
a. Timing:
Harvest potatoes when the foliage starts to die back, usually 90-120 days after planting. Ensure tubers are mature for better storage and quality.
b. Harvesting Method:
Use a potato harvester or dig tubers manually with a fork or spade. Handle tubers carefully to avoid bruising and damage.
c. Machinery:
A mechanical harvester can increase efficiency, especially for large-scale operations. Ensure it is well-maintained and calibrated to reduce tuber loss.
6. Storage
a. Curing:
After harvesting, cure potatoes in a dark, well-ventilated area at 10-15°C for 1-2 weeks to toughen the skin and reduce the risk of rot.
b. Storage Conditions:
Store cured potatoes in a cool, dark, and well-ventilated area at 4-7°C. Avoid exposing them to light, which can cause greening and solanine production.
c. Monitoring:
Regularly check stored potatoes for signs of disease or sprouting. Remove affected tubers promptly to prevent the spread of issues.
7. Record-Keeping and Evaluation
Maintain detailed records of planting dates, fertilization schedules, pest and disease occurrences, and yield data. Evaluating these records helps in refining practices for future seasons and improving overall productivity.
By following these guidelines, South African farmers can efficiently manage the entire potato growing process from seed to storage, ensuring high yields and quality produce. Effective land preparation, proper pest and disease management, and attention to growth and storage conditions are key to successful potato farming.
Join 'Farmers Mag' WhatsApp Channel
Get the latest Farming news and tips delivered straight to your WhatsApp
CLICK HERE TO JOIN


