Millet is a hardy, drought-tolerant grain that thrives in various climates, making it a suitable crop for many South African farmers. This guide provides detailed information on the process of growing millet, from land preparation to harvest and storage. It covers essential inputs, machinery, and management practices to ensure a successful millet crop.
1. Land Preparation
Site Selection: Choose well-drained soil with a pH level between 6.0 and 7.0. Millet can grow in a range of soil types, including sandy, loamy, and clay soils, but well-drained soils are preferred.
Tillage: Prepare the land by plowing and harrowing to create a fine seedbed. This helps in removing weeds, improving soil aeration, and enhancing seed-to-soil contact. Use a tractor with a plow and harrow for efficient land preparation.
Soil Testing: Conduct a soil test to determine nutrient levels and pH. This will guide the selection of appropriate fertilizers and lime if needed to adjust soil pH.
2. Seed Selection and Sowing
Seed Selection: Choose high-quality millet seeds that are disease-resistant and suited to your region’s climate. Varieties such as Pearl Millet and Finger Millet are commonly grown in South Africa.
Sowing: Plant millet seeds at a depth of 2-4 cm and spacing them 15-20 cm apart in rows. The ideal planting time is at the start of the rainy season, usually from October to December in South Africa. Use a seed drill or a hand planter for sowing.
Seed Rate: Use a seeding rate of 8-10 kg per hectare for pearl millet and 5-8 kg per hectare for finger millet, depending on the variety and planting method.
3. Fertilization
Nutrient Requirements: Millet generally requires balanced fertilization. Apply a compound fertilizer with an NPK ratio of 10-20-10 or similar before planting. A general recommendation is 50-100 kg of fertilizer per hectare.
Application: Fertilizer can be applied during land preparation or as a side dressing. Avoid over-fertilizing, as this can lead to excessive vegetative growth at the expense of grain production.
Organic Options: Consider using compost or manure to enhance soil fertility and structure. Organic matter can also improve moisture retention and soil health.
4. Irrigation and Water Management
Water Requirements: Millet is drought-tolerant but requires adequate moisture during germination and early growth stages. It needs about 500-700 mm of water throughout the growing season.
Irrigation: In areas with unreliable rainfall, supplemental irrigation may be necessary. Use drip or furrow irrigation systems to efficiently deliver water to the crop.
Watering Frequency: Water the crop every 7-10 days during dry spells. Avoid waterlogging, which can lead to root diseases.
5. Weed and Pest Management
Weed Control: Weeds can compete with millet for nutrients and water. Implement pre-emergence herbicides such as glyphosate or post-emergence options like 2,4-D, depending on the weed species and growth stage.
Pest Management: Monitor for pests such as millet stem borers and aphids. Use appropriate insecticides like pyrethroids if infestations are severe. Regular scouting and integrated pest management (IPM) practices are crucial for minimizing pest damage.
Diseases: Common millet diseases include downy mildew and blast. Use fungicides such as Mancozeb or Copper oxychloride when disease symptoms are observed. Rotate crops to reduce disease pressure and practice good field sanitation.
6. Growth Stages and Monitoring
Germination: Millet seeds typically germinate within 5-10 days. Ensure consistent moisture during this period to support seedling emergence.
Vegetative Stage: Millet develops leaves and stems. Regularly check for pests and diseases, and manage weeds to reduce competition.
Reproductive Stage: The plant begins to flower and set seed. This stage is critical for yield determination. Ensure adequate moisture and protect the crop from pests.
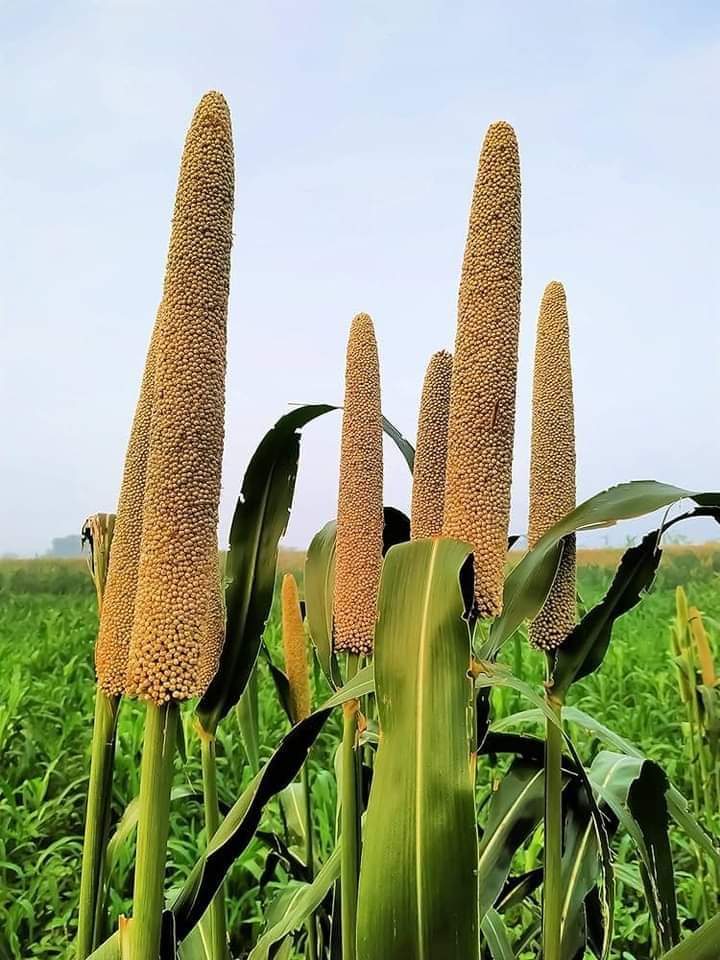
Maturity: Millet reaches maturity approximately 70-90 days after planting, depending on the variety. The seeds will harden and turn a golden-brown color.
7. Harvesting
Timing: Harvest millet when the seeds are firm and the panicles are dry. This usually occurs 2-3 weeks after the plant reaches physiological maturity.
Method: Use a combine harvester for large-scale operations. For smaller farms, hand harvesting with sickles or shears can be effective. Ensure that the crop is fully dry to prevent mold and spoilage.
Post-Harvest Handling: Clean and thresh the harvested millet to separate the seeds from the chaff. Store the seeds in a cool, dry place in airtight containers to prevent pest infestations and maintain seed quality.
8. Storage
Drying: Before storage, ensure that millet is adequately dried to a moisture content of 12-14%. Use mechanical dryers or sun-drying methods if necessary.
Storage Conditions: Store millet in sealed containers or silos to protect against moisture and pests. Maintain storage areas at low humidity and temperature to extend shelf life.
By following these detailed steps, South African farmers can effectively grow, manage, and harvest millet, contributing to a successful and sustainable farming operation. Silvopasture, integrated pest management, and careful attention to soil and water management will further enhance the productivity and resilience of your millet crop.
Join 'Farmers Mag' WhatsApp Channel
Get the latest Farming news and tips delivered straight to your WhatsApp
CLICK HERE TO JOIN