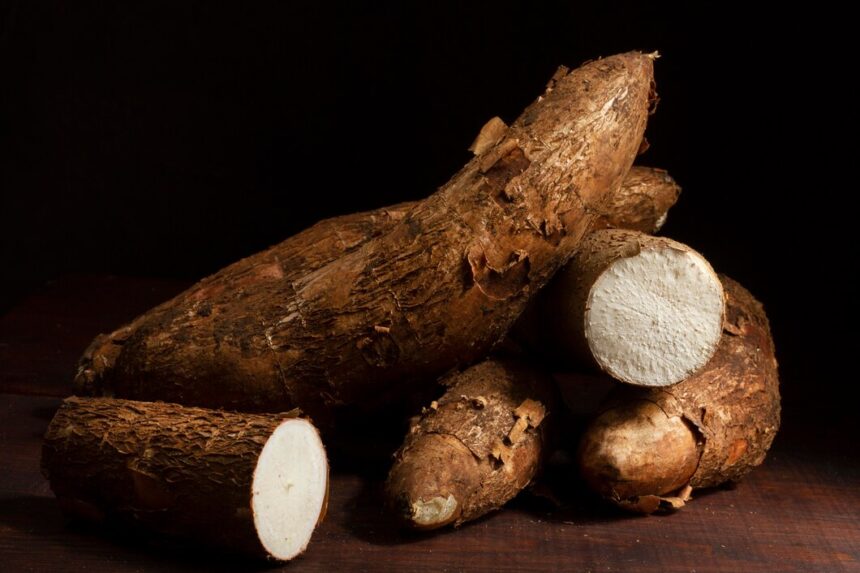
Cassava (Manihot esculenta) is a vital root crop widely cultivated for its high starch content and adaptability to various growing conditions. In South Africa, where cassava can thrive in diverse climates, understanding the complete growth process from planting to storage is crucial for a successful harvest. This guide covers the entire cassava cultivation process, including land preparation, growth stages, inputs, and management practices.
1. Land Preparation
Soil Type: Cassava grows well in well-drained, loamy soils with a pH between 5.5 and 7.0. Avoid heavy clay soils that retain excess moisture, which can lead to root rot.
Land Preparation:
- Clearing and Tilling: Clear the land of weeds and debris. Use a tractor or a manual tiller to plow the soil to a depth of 20-30 cm. This helps in breaking up soil compaction and improves aeration.
- Fertilization: Incorporate well-rotted manure or compost into the soil before planting to enhance soil fertility.
2. Planting
Seed Selection: In South Africa, cassava is typically grown from stem cuttings rather than seeds. Select healthy, disease-free cassava stems that are 20-30 cm long and have at least 4-6 nodes.
Planting Process:
- Spacing: Plant the stem cuttings at a depth of about 5-10 cm, with a spacing of 1 meter between plants and 1.5 meters between rows.
- Timing: Plant cassava at the beginning of the rainy season for optimal growth. In South Africa, this is usually between September and November.
3. Growth Stages
Germination and Early Growth (0-3 months):
- Watering: Ensure adequate moisture for the cuttings to sprout. Water regularly but avoid waterlogging.
- Weed Control: Maintain weed-free conditions around the plants using manual weeding or herbicides if necessary.
Vegetative Growth (3-9 months):
- Fertilization: Apply a balanced fertilizer (e.g., NPK 14-14-14) to support vegetative growth. Follow the recommended application rates, usually about 60 kg/ha of nitrogen, 30 kg/ha of phosphorus, and 30 kg/ha of potassium.
- Watering: Cassava requires 800-1200 mm of water annually. During dry periods, supplement rainfall with irrigation. Aim for 1-2 watering sessions per week, depending on soil moisture.
Root Development (9-12 months):
- Pest and Disease Management: Monitor for pests and diseases (see below). Continue to manage weeds and ensure the plants are well-watered.
4. Harvesting
Timing: Cassava is typically ready for harvest 12-18 months after planting, depending on the variety and growing conditions. The roots should be harvested before they become too fibrous.
Harvesting Process:
- Tools: Use a spade or fork to carefully lift the roots without damaging them. In larger farms, a cassava harvester can be used for efficiency.
- Post-Harvest Handling: Handle the roots gently to avoid bruising or damage. Remove excess soil and clean the roots.
5. Storage
Storage Conditions:
- Duration: Cassava roots have a short shelf life and should be processed or consumed within a few days of harvest. For longer storage, the roots can be processed into products like flour or chips.
- Processing: Peel and slice the roots, then dry them thoroughly before storing in a cool, dry place. Proper drying reduces the risk of mold and rot.
6. Inputs and Machinery
Fertilizers:
- Use balanced fertilizers during the growing season. Organic amendments like compost or manure can also be beneficial.
Machinery:
- Plowing and Tilling: Use tractors or manual tillers for land preparation.
- Planting: While planting can be done manually, mechanized planters can improve efficiency.
- Harvesting: For large-scale operations, consider using cassava harvesters to speed up the process.
7. Pest and Disease Management
Common Pests:
- Cassava Mealybug: Causes stunted growth and root damage. Use insecticides like imidacloprid or systemic treatments.
- Cassava Green Mite: Infests leaves, causing yellowing and distortion. Miticides or acaricides may be required.
Common Diseases:
- Cassava Mosaic Disease: Causes leaf distortion and stunting. Use resistant varieties and remove infected plants.
- Cassava Bacterial Blight: Results in leaf spots and wilt. Apply copper-based bactericides and practice good sanitation.
Pesticides and Herbicides:
- Apply pesticides and herbicides according to the manufacturer’s instructions and local agricultural guidelines. Use them judiciously to avoid resistance development and environmental impact.
8. Additional Tips
- Regular Monitoring: Regularly inspect your cassava crop for signs of pests, diseases, and nutrient deficiencies.
- Record Keeping: Maintain detailed records of planting dates, fertilizer applications, pest treatments, and harvesting dates to track crop performance and improve future practices.
Growing cassava in South Africa requires careful planning and management from land preparation through to storage. By understanding each growth stage, utilizing appropriate inputs and machinery, and managing pests and diseases effectively, farmers can achieve a successful and bountiful cassava harvest. Embrace these practices to optimize your cassava production and contribute to a more resilient and productive agricultural system.


